How to Spot Workplace Signage Gaps
Workplace signage gaps can lead to serious safety risks and hefty fines. Missing, damaged, or non-compliant signs not only increase the likelihood of workplace incidents but also violate Australian safety standards like AS 1319-1994.
Here’s what you need to know:
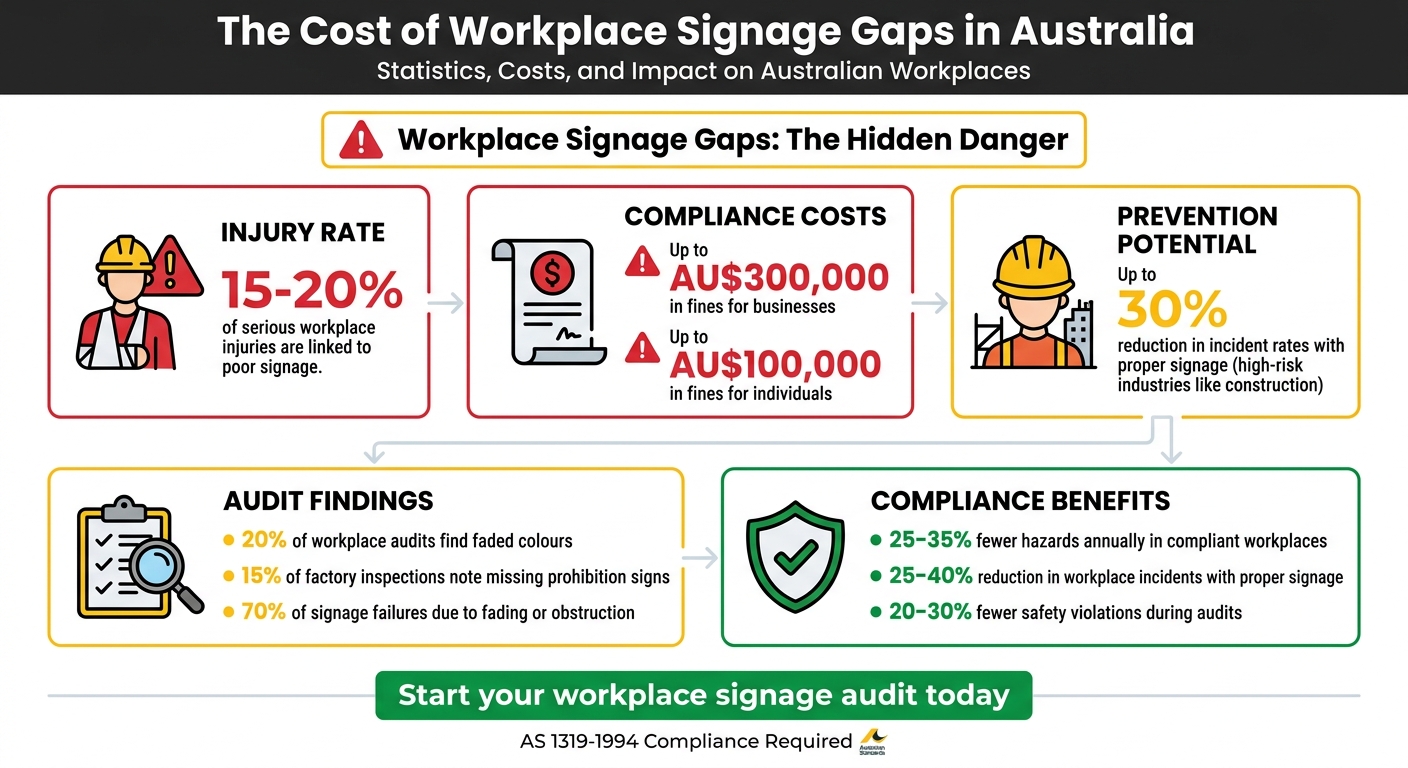
- 15–20% of serious workplace injuries are linked to poor signage.
- Non-compliance can cost up to AU$300,000 for businesses or AU$100,000 for individuals.
- High-risk industries like construction could reduce incident rates by up to 30% with proper signage.
To address these gaps:
- Understand essential safety signs and AS 1319-1994 standards.
- Conduct thorough workplace inspections, focusing on high-risk zones.
- Use a compliance checklist to identify and document gaps.
- Ensure signs are durable, visible, and regularly maintained.
- Replace missing or damaged signs quickly, prioritising high-risk areas.
Effective signage saves lives, reduces hazards, and keeps businesses compliant. Start by auditing your workplace zones today to avoid preventable accidents and penalties.
Workplace Signage Gaps: Key Statistics and Compliance Costs in Australia
Understanding Safety Sign Standards
sbb-itb-9950c92
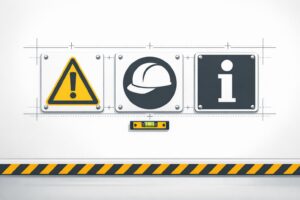
Step 1: Know the Australian Safety Signage Standards
Before you can address signage gaps, it’s important to understand what compliant safety signage actually looks like. In Australia, AS 1319-1994 is the governing standard for safety signs in workplaces. This standard outlines the design, colours, placement, and use of signs to ensure they guide safety behaviour and provide critical emergency information, such as fire protection details. Compliance with AS 1319-1994 is mandatory under WHS Regulations, making it essential to both legal requirements and workplace safety. Familiarity with these standards is the foundation for identifying and resolving any deficiencies in signage.
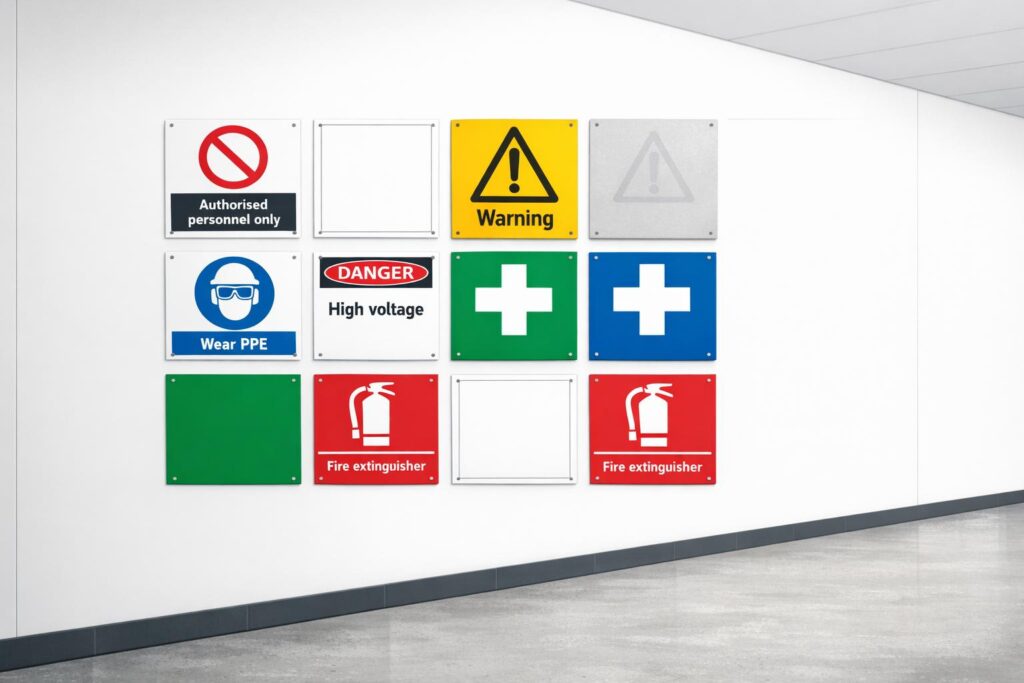
The 6 Main Categories of Safety Signs
AS 1319-1994 classifies safety signs into six main categories, each defined by specific colours, symbols, and signal words. These categories are designed to ensure consistency and clarity across workplaces. The colours, fonts, and symbols used in these signs adhere to additional standards, including AS 2700-2011, AS 1744:2015, and AS 2342-1992. A solid understanding of these categories is key to spotting areas where signage might be missing or inadequate.
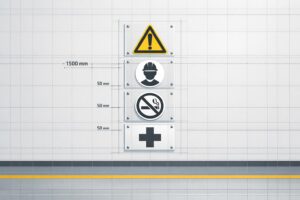
Placement and Design Requirements
Proper placement is just as critical as design when it comes to safety signage. Signs must be positioned where they are immediately visible to workers entering hazardous zones or seeking emergency guidance. For environments with low lighting, AS/NZS 1906.1:2007 specifies the use of retroreflective materials to improve visibility. Additionally, internally illuminated signs or those with external lighting must align with BS 873.5 standards.
To ensure signs are effective, they should be appropriately sized to suit the viewing distance and made from durable materials. This is particularly important in outdoor or harsh conditions, where factors like UV exposure, weather, and physical wear can degrade signs over time. Regular checks are necessary to confirm that all signs remain legible, durable, and compliant with both safety and WHS legal standards.
Step 2: Walk Through Your Workplace
After getting familiar with the standards, the next step involves a physical inspection of your workplace. To ensure no area is left unchecked, take a systematic, zone-by-zone approach. Divide the workplace into zones based on your floor plan or operational workflow. This ensures you don’t miss critical spaces like mezzanines, basement storage, or outdoor areas such as car parks and loading docks. Breaking it down this way helps you identify zones where hazards might exist [10].
During the walkthrough, check how signage functions in active conditions. Machinery in motion could obscure signs, as can swinging gates, moving parts, or open doors. Signs that seem clear during static inspections may not be visible during regular operations [10]. Also, evaluate lighting conditions: a sign that’s visible during the day might be unreadable at night or in poorly lit areas.
Identify High-Risk Areas
After your initial walkthrough, focus on areas with higher risks. Machinery with moving parts, such as pulleys, lathes, and conveyor systems, requires clear signage for guarding and lockout/tagout procedures. Similarly, electrical equipment and systems under pressure (whether pneumatic or gravitational) demand attention [10].
Pay special attention to chemical storage areas. Locations where hazardous substances, ingredients, or wastes are stored must have proper labels indicating the presence of chemicals and the location of Safety Data Sheets. Confined spaces must be permanently signed to prevent unauthorised entry and warn of atmospheric risks [10]. Don’t forget often-overlooked spaces like storage rooms, rest areas, and locker rooms, which can also harbour hidden hazards [10].
| Hazard Category | Specific Areas to Inspect | Required Signage Examples |
|---|---|---|
| Safety Hazards | Machine guards, confined spaces, fall protection zones | Danger: Keep Hands Clear, Confined Space: Permit Required |
| Chemical Hazards | Storage cabinets, waste accumulation points | Flammable Liquid Storage, Hazardous Waste |
| Emergency | Fire exits, extinguishers, first aid kits | Fire Exit, First Aid Station, Fire Extinguisher Inside |
| Structural | Warehouse racking, transport docks, stairways | Watch Your Step, Maximum Load Capacity |
Check Visibility and Accessibility
The placement of signs is crucial for worker safety and compliance. Signs should always be installed at eye level and positioned before workers encounter the hazard, not after they’ve already entered the danger zone [9]. As you walk through each area, look for obstructions that could block a sign’s visibility.
For instance, fire extinguisher signage in Australia must be visible from a distance of 20 metres. Additionally, there should be at least 1 metre of clearance around the extinguisher itself to ensure it’s easily accessible [1]. Verify these distances and clearances during your inspection. Emergency exit signs should also be properly illuminated, especially in dimly lit areas. Exit signs need to undergo 90-minute discharge tests every 6 to 12 months to comply with AS/NZS 2293 [1].
Signs must remain legible to meet compliance standards. Faded, dirty, or damaged signs need replacing [1]. Outdoor areas like car parks and loading zones require durable signage materials to withstand weather conditions. Check that speed limit or loading zone signs are clear about time limits and authorised vehicle types [1].
The observations you make during this step will form the foundation of your audit checklist in the next stage.
Step 3: Audit Sign Categories and Compliance
After completing your workplace walkthrough, the next step is to ensure that all required sign categories are in place and meet compliance standards. This step is crucial for protecting workers and avoiding hefty fines. Under the Work Health and Safety Act 2011, non-compliant signage can result in penalties ranging from AU$10,000 to AU$3 million, depending on the severity of the breach [7][6]. Use your checklist to document findings as you go.
Use a Compliance Checklist
A compliance checklist is an essential tool to ensure no mandatory sign is missed. Start by dividing your workplace into zones – such as production areas, offices, warehouses, or outdoor spaces – and systematically check each of the six AS 1319 sign categories in these zones. For instance:
- Mandatory signs should be displayed in forklift operating zones.
- Prohibition signs must clearly mark no-entry areas.
- Emergency signs should be located near first aid kits and emergency exits [4][5].
When filling out your checklist, record the following details: the location of each sign, its condition, compliance status (yes/no), and any required actions. Using digital or laminated checklists can make this process more efficient. Safety professionals recommend conducting audits quarterly to align with Safe Work Australia‘s best practices [4][5]. For a medium-sized facility, plan for about two hours to complete the audit, prioritising high-risk areas first to address critical gaps immediately [3][6].
Take photos of any issues you find. This not only provides a visual record for your report but also supports budget requests for replacement signage. Engaging team leads or supervisors during the process can be invaluable – they often notice missing or outdated signs in their daily work areas that might be overlooked during a general inspection.
Once the checklist is completed, compare your findings directly against AS 1319 standards to confirm compliance.
Compare Against AS 1319 Standards
AS 1319 specifies the exact colour schemes, shapes, and signal words required for safety signage. For example, Danger signs must feature a red background with white pictograms and the word "DANGER". Refer back to Step 1 for more details on sign design.
| Category | Colour/Shape | Signal Word | Example |
|---|---|---|---|
| Danger | Red oval | DANGER | High voltage area |
| Warning | Yellow triangle | WARNING | Slippery when wet |
| Prohibition | Red circle | NO/Do Not | No unauthorised entry |
| Mandatory | Blue circle | Wear/Must | Safety helmet required |
| Emergency | Green rectangle | EXIT/FIRST AID | Emergency exit |
| Fire | Red rectangle | FIRE | Fire hose reel |
Use this table as a reference to verify each sign. Common issues include faded colours – present in about 20% of workplace audits according to Safe Work Australia – incorrect placement of emergency signs, and missing prohibition signs, which are noted in roughly 15% of factory inspections [3][6].
Additionally, ensure that all pictograms meet ISO standards, particularly in workplaces with multilingual staff, where text-only signs may cause confusion [2][4]. Check that signs are well-lit, maintaining illumination levels of 400–600 lux. A quick flashlight test during the walkthrough can help identify visibility problems in dimly lit areas [2][4].
Step 4: Inspect Sign Condition and Maintenance
Even signs that meet compliance standards can pose risks if they become damaged, faded, or dirty. When signs are hard to read, workplaces may face safety hazards and compliance issues. This step focuses on ensuring signs remain effective over time through regular inspections and upkeep.
Look for Wear and Tear
Australia’s outdoor conditions can be tough on safety signage. UV exposure can cause colours to fade, reducing the contrast required under AS 1319. Signs made without UV-resistant materials often show noticeable fading within 12–24 months in areas with high sun exposure[2]. Coastal workplaces face additional challenges like salt spray, which speeds up corrosion, while inland areas may deal with extreme temperature swings that weaken materials.
During inspections, take note of any visible signs of deterioration. Look for faded colours, text that’s hard to read, physical damage like dents or cracks, rust, or signs blocked by dirt or vegetation. Fire extinguisher signs need extra attention – they must be visible from 20 metres and have at least 1 metre of clear space around them[1]. To support replacement requests and maintain compliance records, photograph any damaged signs.
Maintenance Best Practices
Regular maintenance ensures your signs remain effective and compliant. Set up a cleaning schedule using mild soap and a soft cloth to keep signs in good condition. In dusty environments like warehouses or construction sites, cleaning every three months helps prevent grime from covering critical safety information.
Emergency and exit signs have specific maintenance requirements under AS/NZS 2293. These include inspections every 6 and 12 months, as well as 90-minute battery discharge tests to verify they’ll work during power outages[1]. Keep detailed records of all maintenance activities, including tests, inspections, and replacements. For general safety signage, inspect quarterly in high-UV or coastal areas, and every six months in moderate indoor climates. Replace signs if more than 10–15% is damaged, the text is unreadable, or the colour contrast no longer meets AS 1319 standards[2]. Opt for durable replacements with UV protection and outdoor-grade printing to reduce future maintenance costs and ensure long-term compliance in Australia’s challenging conditions.
Step 5: Document Gaps and Implement Fixes
Once you’ve identified any issues, it’s time to document them thoroughly and act promptly. Create a checklist – either digital or printable – that includes key details like the location of the sign, its type, the specific problem (e.g., missing, faded, or non-compliant), the associated risk level, and photo evidence. This methodical approach not only ensures you capture every detail but also provides a clear record for Workplace Health and Safety (WHS) audits and budget planning. Keeping these records is essential for maintaining compliance with AS 1319 and helps prioritise what needs fixing first.
Address High-Risk Areas First
Start by focusing on high-risk areas. Use a risk matrix to evaluate both the likelihood and severity of potential hazards. High-risk issues must be dealt with immediately. For example, missing danger signs near unguarded machinery, blocked emergency exits, or absent lockout/tagout signage near electrical panels are critical concerns. Research shows that proper signage can reduce workplace incidents by 25–40%, and data from Australian workplaces highlights that unaddressed high-risk gaps were linked to 15% of reportable incidents[3]. Aim to resolve these critical issues within 24–48 hours. Once high-risk areas are addressed, move on to medium risks, like faded fire equipment signs, and finally, tackle lower-priority items such as general notice signs. With a clear action plan, the next step is to choose the right replacements.
Choose Durable and Compliant Replacements
When replacing signs, ensure they meet AS 1319 standards. Opt for materials that can handle Australia’s challenging conditions – signs made from at least 1.6mm aluminium with UV-resistant lamination are ideal, lasting five or more years even under intense sun and weather. For coastal areas, choose materials resistant to corrosion caused by salt spray. Suppliers like PXP Safety (https://pxpsafety.com.au) offer AS 1319-compliant options across various categories, including danger, fire equipment, first aid, and mandatory signs. They also provide custom sizing to suit specific needs. Always verify the supplier’s certification and request samples to confirm compliance. Once you’ve sourced the signs, install them at eye level (1.2–1.6m as per AS 1319) and make sure to brief your team on the updates.
Source Compliant Signage Solutions
Once you’ve identified gaps in your workplace signage, the next step is to partner with a certified supplier. It’s crucial to ensure that the provider offers signs compliant with AS 1319 standards, covering the six key categories: danger, fire equipment, first aid, mandatory, prohibition, and safe condition. Non-compliance can lead to serious consequences – 15% of preventable workplace accidents are linked to inadequate signage [11], and breaches of WHS regulations can result in fines of up to AU$300,000 [2].
A reliable supplier is essential for meeting these stringent requirements. PXP Safety (https://pxpsafety.com.au) is a standout option, specialising in AS 1319-compliant signage tailored for Australian workplaces. Their signs, made from durable aluminium with UV protection and outdoor-grade printing, are designed to last over a decade. Their product range includes everything from high-voltage danger signs to mandatory PPE notices, making them suitable for a variety of environments like workshops and warehouses. They also offer custom solutions for site-specific hazards, such as chemical warnings or confined space signs, with designs delivered in just 3–5 business days – all while maintaining full compliance with AS 1319.
When selecting a supplier, it’s wise to request compliance certificates and samples to ensure the signage meets visibility and colourfastness standards. Pricing for standard AS 1319 danger signs (450×600mm aluminium) typically ranges from AU$25 to AU$50, while custom mandatory signs can cost between AU$40 and AU$100, depending on size and lamination. Bulk orders of 10 or more signs often come with discounts of 15–25%, and fire equipment signage starts at AU$20 per unit [12].
Look for suppliers that offer added benefits like free design consultations and warranties, which help maintain compliance over time. Proper signage can make a significant difference – workplaces with fully compliant signs see 20–30% fewer safety violations during audits [13], and 95% of clients report smoother SafeWork inspections when using durable, custom solutions. After sourcing your signage, arrange for professional installation to ensure signs are mounted at the correct eye level (1.2–1.6 metres) and provide updates to your team. This final step ensures your workplace is fully equipped and compliant.
Conclusion
Identifying and addressing gaps in workplace signage demands constant vigilance to ensure both safety and compliance. By following these five steps, you can turn signage into more than just a regulatory requirement – it becomes a key defence against workplace hazards.
Adhering to AS 1319 standards is essential. Poor signage is linked to 15–20% of preventable workplace incidents in Australia. While avoiding fines is important, effective signage also reduces risks by delivering clear, immediate warnings and instructions. According to Safe Work Australia, workplaces with proper signage compliance see 25–35% fewer hazards annually, highlighting the importance of closing signage gaps.
Start your next safety walkthrough right away, prioritising high-risk areas like those with heavy machinery, chemicals, or electrical hazards. Address critical issues within seven days, and ensure replacement signs are durable, such as UV-protected aluminium, to withstand harsh conditions. Regular upkeep is just as crucial – safety experts recommend annual audits and post-incident reviews, as fading or obstructed signs account for about 70% of signage failures.
After addressing immediate risks, focus on upgrading outdated signage. When replacing signs, choose high-quality, AS 1319-compliant options designed for Australia’s environment. PXP Safety offers a range of durable safety signs that meet these standards, ensuring your workplace remains both safer and compliant.
FAQs
What signs are legally required under AS 1319-1994?
AS 1319-1994 outlines the required use of specific safety signs in workplaces to maintain safety and meet Australian standards. These include:
- Warning signs: Used to alert individuals to potential hazards.
- Prohibition signs: Indicate actions that are not allowed.
- Mandatory signs: Provide clear safety instructions that must be followed.
- Emergency information signs: Highlight procedures and equipment for emergencies.
These signs play a crucial role in promoting a safe working environment while ensuring compliance with the relevant regulations.
How often should I audit and maintain workplace safety signs?
Workplace safety signs need regular inspections to stay visible, readable, and in line with Australian standards such as AS 1319. While audits are generally advised every 6 to 12 months, the exact timing can vary based on the specific conditions of your workplace. Routine checks are essential for spotting problems like fading, physical damage, or obstructions. Addressing these issues promptly ensures compliance with WHS regulations and helps maintain a safer work environment.
What’s the fastest way to prioritise and fix signage gaps?
To tackle signage gaps effectively, start with a comprehensive safety sign audit. This process helps pinpoint signs that are worn out, damaged, or fail to meet compliance standards. Here’s how you can approach it:
- Map out the workplace: Document all existing signage to understand current coverage and identify missing areas.
- Set up regular inspections: Routine checks ensure signs stay clear, legible, and compliant with safety regulations.
- Address urgent risks first: Prioritise fixing signs that pose immediate safety concerns before handling less critical issues.
By following these steps, you can systematically improve workplace safety and compliance.
Related Blog Posts
You may also be interested in
FAQs About Workplace Safety Signs in Australia
AS 1319 sign types, placement, materials and maintenance for workplace safety and WHS compliance in Australia.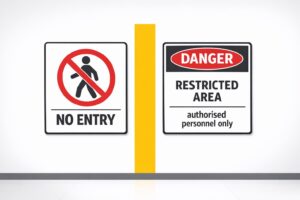
Restricted Area Signs vs. No Entry Signs
Compare No Entry and Restricted Area signs in Australian workplaces — meanings, design differences and AS 1319 compliance.
Symbol Design: Global Standards Explained
Explains ISO 7010 and ISO 3864: standard symbols, colours and sizing for clear, language‑free safety signage and AU compliance.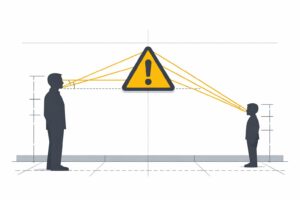
Hazard Sign Visibility Planner
Plan hazard sign placement for max visibility with our free tool. Ensure safety by finding the best spot, height, and angle—try it now!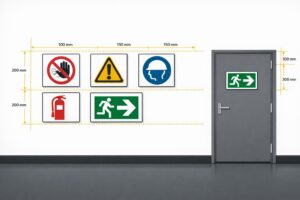
Australian Safety Sign Compliance Guide
Ensure your workplace meets Australian safety sign standards with our easy guide. Get tailored signage advice for compliance today!