Restricted Area Signs vs. No Entry Signs
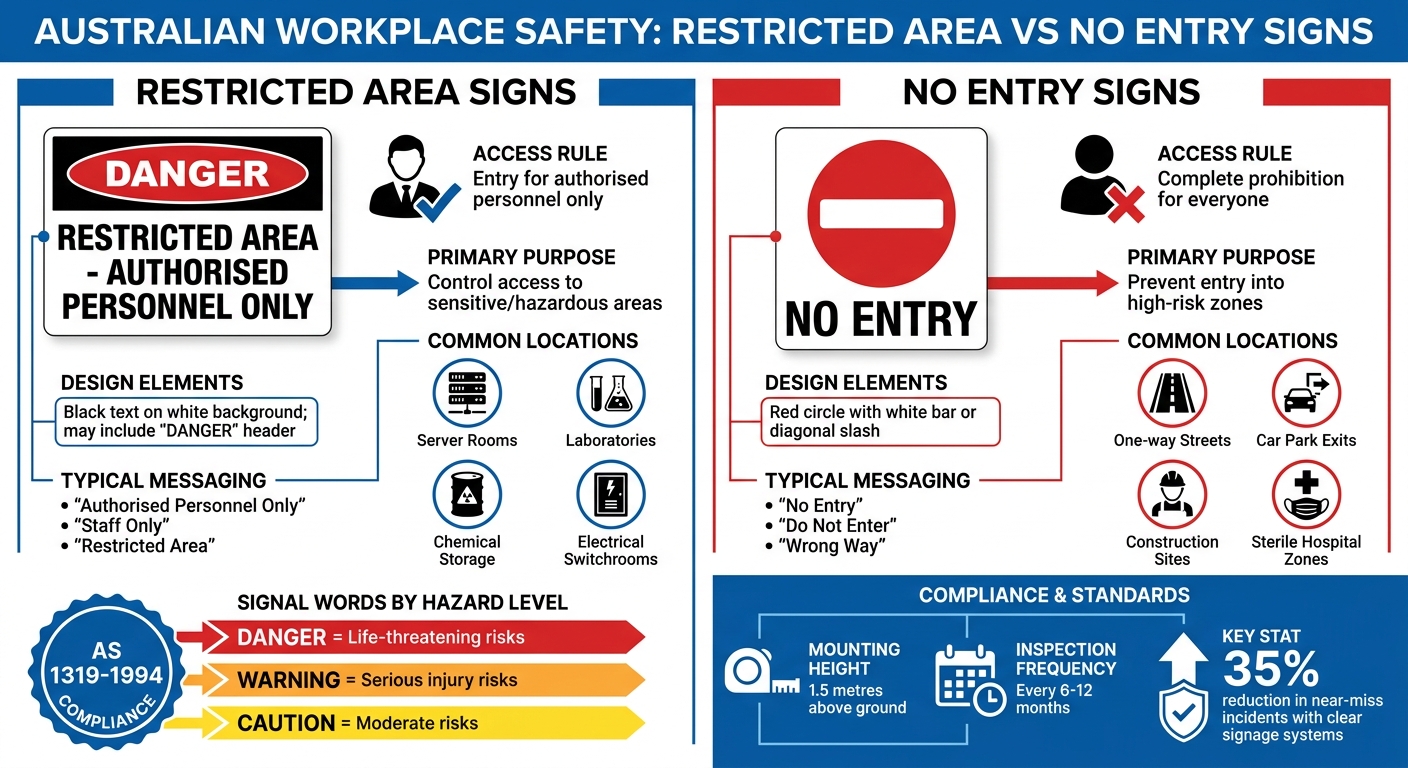
In Australian workplaces, essential safety signs are critical for managing access and reducing risks. Restricted Area signs allow access only to authorised individuals, such as trained staff, while No Entry signs completely prohibit entry to everyone except in emergencies (e.g., police or fire crews). Both types of signs comply with AS 1319-1994, ensuring they meet legal and safety standards.
Key differences include:
- Restricted Area signs: Used for controlled access zones like server rooms or chemical storage, designed with black text on a white background and often paired with specific instructions like "Authorised Personnel Only."
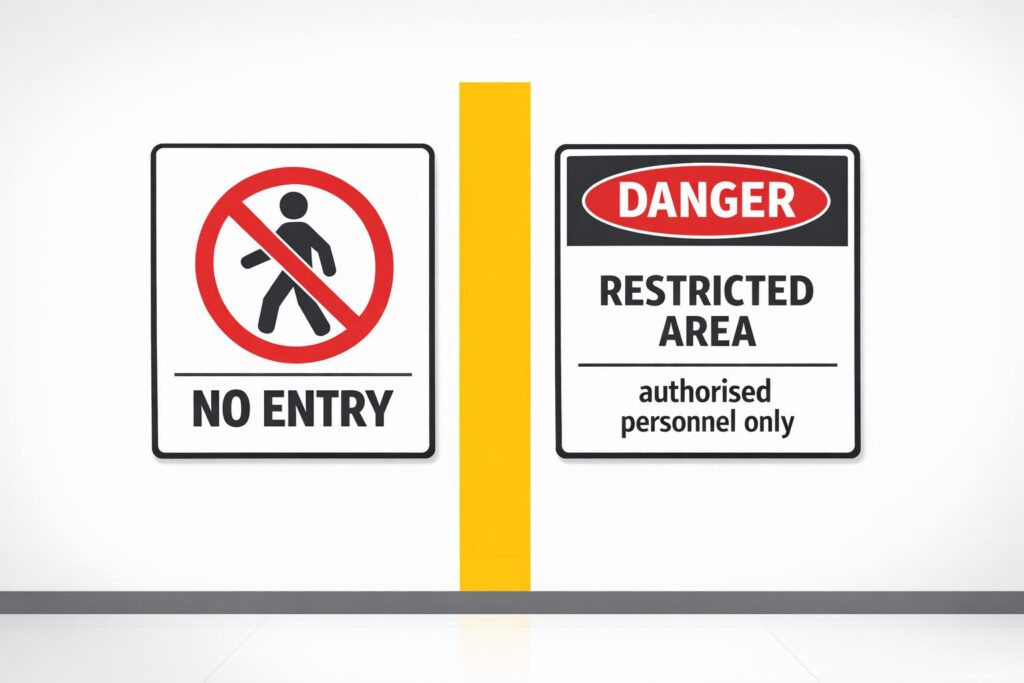
- No Entry signs: Used to prevent all access in areas like construction sites or one-way streets, featuring a red circle with a white bar or diagonal slash.
Both signs play a vital role in workplace safety, but choosing the right one depends on the level of restriction required. Proper placement, compliance with standards, and regular maintenance are crucial to ensuring their effectiveness.
Quick Comparison
| Feature | Restricted Area Signs | No Entry Signs |
|---|---|---|
| Access Rule | Entry for authorised personnel only | Complete prohibition |
| Primary Purpose | Control access to sensitive/hazardous areas | Prevent entry into high-risk zones |
| Design | Black text on white; may include "Danger" | Red circle with white bar or diagonal slash |
| Typical Use | Chemical storage, server rooms | Construction sites, one-way streets |
Correct signage not only prevents accidents but also ensures compliance with Australian regulations, safeguarding both employees and businesses.
Restricted Area Signs vs No Entry Signs: Key Differences and Usage Guide
What Are Restricted Area Signs?
Definition and Purpose
Restricted area signs mark zones that are off-limits to the general public, allowing entry only to those with proper authorisation. These signs don’t entirely prohibit access but make it clear that only individuals with the necessary credentials – like training, qualifications, or official permission – can enter [4][5].
Their role is twofold: to safeguard people from potential hazards and to protect property by limiting access to qualified personnel [6].
"A restricted area authorised personnel only sign serves a critical dual purpose: it controls access to hazardous or sensitive zones while protecting both your business and your people from preventable incidents." – Doug Lindqvist, General Manager, Pinnacle Signage [1]
This dual function is reflected in every aspect of their design.
Design and Appearance
In Australia, restricted area signs adhere to Australian Standard AS 1319-1994, which governs their design, colour scheme, and readability. These signs often feature bold headers such as "Restricted Area" or "Danger", paired with directives like "Authorised Personnel Only" [4][5]. The use of red, black, and white ensures the message is instantly noticeable and conveys a sense of urgency.
A typical high-risk restricted area sign includes the word "Danger" in white text within a red oval, set against a black background [5]. For clarity, the text must be at least 5 mm high for every metre of viewing distance, while symbols must be 15 mm per metre in well-lit areas, with size increased by 50% in dim conditions [5].
Where They’re Used
You’ll find restricted area signs in a wide range of Australian workplaces, including industrial sites, commercial facilities, construction zones, healthcare environments, agricultural operations, airports, and high-security areas. Essentially, they’re used in any setting where untrained or unauthorised access could lead to safety risks or operational issues [1][6].
sbb-itb-9950c92
What Are No Entry Signs?
Definition and Purpose
No entry signs serve as a strict prohibition – no one is allowed to pass unless explicitly exempted, such as emergency services. Unlike restricted area signs, which grant access to authorised individuals, no entry signs completely bar entry, playing a crucial role in maintaining workplace safety. These signs are essential for keeping untrained or unauthorised people out of dangerous areas like machinery zones or chemical storage. On Australian roads, they help prevent wrong-way driving on one-way streets and freeway off-ramps, reducing the chances of head-on collisions. They also assist businesses in complying with the Work Health and Safety Act 2011, showcasing their commitment to duty of care. The message of prohibition is clearly conveyed through their design. [3][2]
Design and Appearance
A typical no entry sign features a red circle with a bold horizontal white bar across it. Some variations include the globally recognised red circle with a diagonal slash. According to Australian Standard AS 1319:1994, these signs must be highly visible and durable, often using high-contrast colours like white text on a red background. The wording depends on the context – for example, "Danger Do Not Enter" is used for high-risk areas, while "Please Do Not Enter" might appear in less hazardous zones. Bold, sans-serif fonts ensure readability from a distance, even under different lighting conditions. These design elements ensure the signs grab attention in various environments. [3]
Where They’re Used
No entry signs are used in a wide variety of settings across Australia. On roads, they signal one-way street entries, freeway off-ramps, and median crossovers. In construction zones, they mark areas like excavations, demolitions, and scaffolding. Industrial and commercial facilities rely on these signs to secure spaces such as machinery rooms, chemical storage areas, electrical switchrooms, server rooms, laboratories, and sterile hospital zones. In rural areas, they are commonly found at farm gates and biosecurity checkpoints to safeguard livestock and crops from contamination. Public events also use no entry signs to restrict access to areas like backstage zones, AV pits, and emergency access routes. [3]
How Restricted Area Signs and No Entry Signs Differ
Access Rules and Meaning
The main difference between these two types of signs lies in who is allowed to enter. No Entry signs enforce a complete ban – no one is allowed to enter under any circumstances, except in emergencies involving services like police or fire crews. On the other hand, Restricted Area signs allow access, but only for those who are authorised, such as individuals with the proper training, permits, or credentials.
"The key distinction lies in the absoluteness of the prohibition. ‘No Entry’ is usually for everyone, while ‘Restricted Area’ implies selective access."
This difference is essential for maintaining safety and security in workplaces. For instance, a No Entry sign at a one-way car park exit prevents vehicles from driving in the wrong direction, while a Restricted Area sign at a chemical storage facility ensures only trained personnel enter. Each type of sign reinforces its specific purpose through its design and messaging.
Design and Messaging Differences
The design of No Entry signs is bold and immediate, using red graphics to grab attention. These signs often feature a red circle with a white horizontal bar (for traffic control) or a red circle with a diagonal slash, paired with messages like "No Entry", "Do Not Enter", or "Wrong Way."
Restricted Area signs, however, prioritise clear communication with high-contrast black text on a white background. They often include specific instructions such as "Authorised Personnel Only", "Staff Only", or "Restricted Area." For areas with significant hazards, these signs may also feature a danger header – such as a red oval within a black rectangle – to highlight the risks involved. Both types of signs comply with AS 1319-1994, ensuring consistency in Australian workplaces. The following table highlights the key differences in their use and design.
Usage Comparison
| Feature | No Entry Signs | Restricted Area Signs |
|---|---|---|
| Access Rule | Absolute prohibition | Entry permitted only for authorised personnel |
| Primary Purpose | Prevent wrong-way traffic and entry into hazardous areas | Control access where hazards exist |
| Common Locations | One-way streets, car park exits, excavations, and sterile hospital zones | Server rooms, laboratories, chemical storage, and electrical switchrooms |
| Visual Design | Red circle with a white bar or red annulus with a diagonal slash | Black text on a white background; may include danger headers |
| Typical Messaging | "No Entry", "Do Not Enter", or "Wrong Way" | "Authorised Personnel Only", "Staff Only", or "Restricted Area" |
Choosing the right sign is critical for each situation. For example, a construction site with deep excavations would use No Entry signs to keep everyone away from hazardous zones, while a Restricted Area sign is better suited for an IT room, granting access only to qualified technicians.
Australian Compliance Requirements
Legal Standards for Safety Signs
In Australia, compliance with safety signage is governed by AS 1319-1994, a detailed 35-page standard that outlines the requirements for safety signs used in workplaces. This standard, reconfirmed in 2018, remains a cornerstone for occupational safety today.
No Entry signs, classified as Prohibition signs, must feature a red circle with a diagonal crossbar overlaying a black symbol on a white background. On the other hand, Restricted Area signs are typically categorised as Regulatory or Mandatory signs. Mandatory signs specifically require a blue circle with a white symbol. To meet compliance, these signs must also align with other standards, including AS 2700-2011 for colour specifications, AS 1744:2015 for typography, and AS 2342-1992 for the design of symbols.
"The standard ensures safety signs are universally recognisable." – Industro [7]
These legal standards are complemented by strict regulations concerning the physical characteristics of the signs.
Durability and Visibility Requirements
Signage must be placed where it is clearly visible from the direction of approach. Under AS 1319, specific luminance levels are required for safety colours: red (used in No Entry signs) must have a luminance of at least 0.07, blue (used in some Restricted Area signs) requires a minimum of 0.05, yellow warning colours need 0.45, and green emergency colours must achieve at least 0.12.
For environments demanding high visibility or night-time use, materials must adhere to AS/NZS 1906.1:2007, which sets standards for retroreflective properties. Any signage that becomes faded, damaged, or obstructed must be promptly replaced. SafeWork inspectors are authorised to issue improvement notices for non-compliant signs, often requiring corrective action within 8 to 30 days. Research has shown that clear signage systems have led to a 35% reduction in near-miss incidents in Australian workplaces [9]. These durability and visibility requirements highlight the importance of maintaining compliant and strategically placed signage.
Where to Place Signs
Proper placement is as critical as design. Signs should be mounted at eye level and remain unobstructed by doors, machinery, or stored items to ensure they are easily visible from the intended direction of approach. For areas where life-threatening hazards exist, a "Danger" sign (featuring red, white, and black) should be used instead of a standard No Entry sign.
Regular inspections are vital to ensure signs remain legible and undamaged. Under the WHS Act 2011, a Person Conducting a Business or Undertaking (PCBU) has a legal obligation to provide adequate safety information, including compliant signage for hazards that cannot be eliminated. In areas involving vehicle movement, compliance with AS 1742.1 (updated in 2021) is required, as this standard governs traffic-related signage, which may overlap with restricted area markings in spaces like loading zones [7][8].
How to Choose the Right Sign
Selecting the right sign is a key part of maintaining effective safety protocols. The type of sign you choose depends on the specific risks and requirements of the area.
When to Use Restricted Area Signs
Restricted Area signs are essential for controlling access to spaces that require special authorisation. These signs are ideal for locations containing sensitive equipment, hazardous substances, or tasks that demand specialised training. For instance, they are commonly used in:
- Data centres and server rooms housing high-value hardware
- Electrical rooms with high-voltage equipment
- Chemical storage areas requiring personal protective equipment (PPE)
"A restricted area authorised personnel only sign is a fundamental component of a robust safety strategy, ensuring that hazards are identified and access is controlled in accordance with Australian safety expectations." – Doug Lindqvist, General Manager, Pinnacle Signage
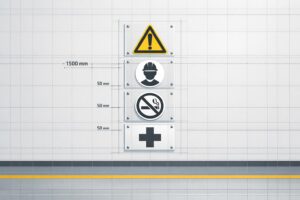
It’s important to match the signal word on the sign to the level of hazard present. Use DANGER for life-threatening risks, WARNING for serious injury risks, and CAUTION for moderate risks. For maximum visibility, signs should be mounted at about 1.5 metres above the ground.
When to Use No Entry Signs
No Entry signs are most effective for managing traffic and preventing unauthorised access. They are commonly used in:
- One-way lanes or car park exits to prevent vehicles from entering restricted areas
- Construction site boundaries to protect the public from heavy machinery and excavation zones
- Private property gates or roads to restrict general access
In areas where life-threatening hazards exist, a Danger sign with red, white, and black colours is more appropriate than a standard No Entry sign. To strengthen the message, No Entry signs can be paired with physical barriers like locked gates or electronic access systems.
By understanding where and how to use these signs, you can ensure your workplace remains safe and compliant.
PXP Safety‘s Sign Options
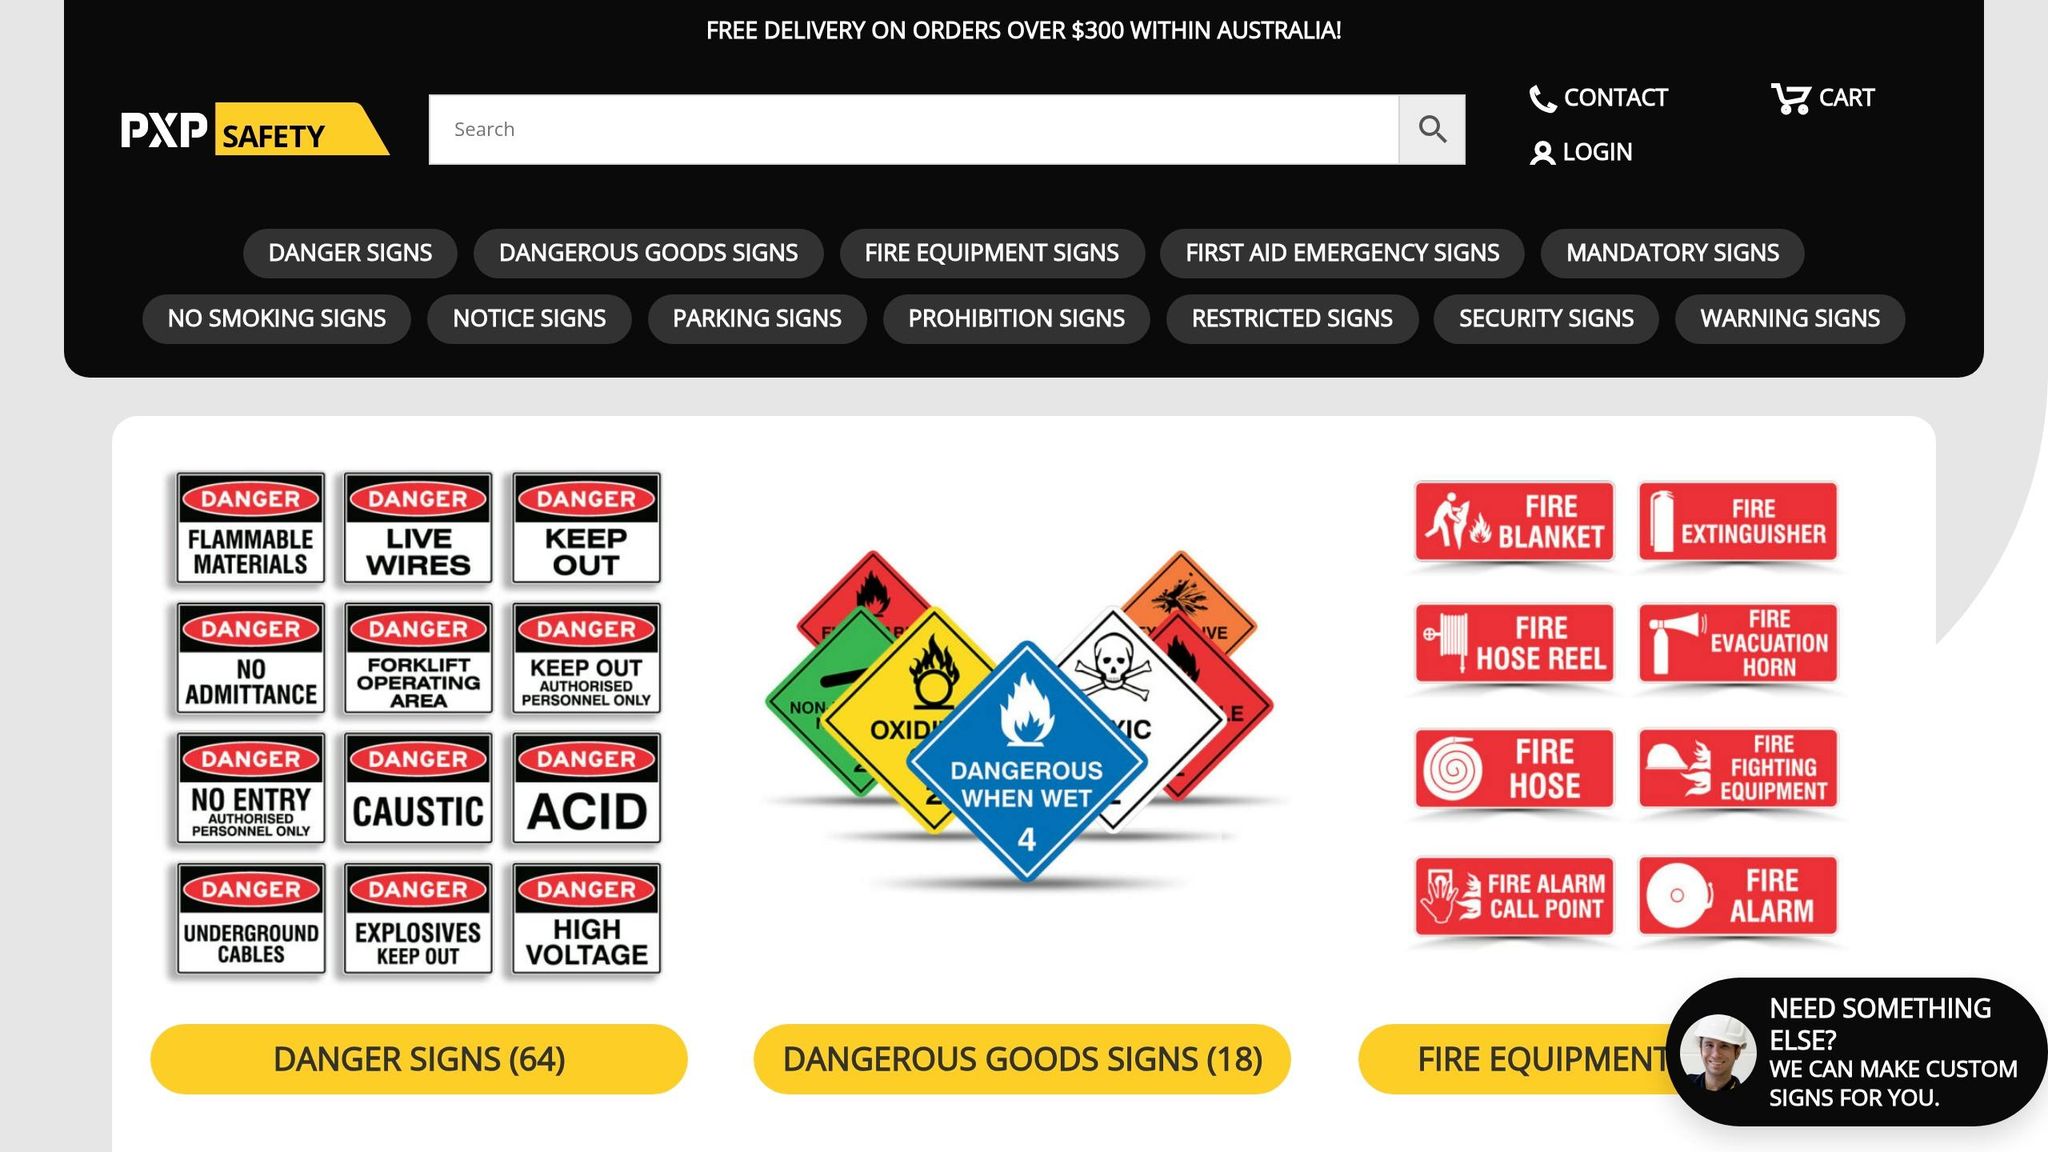
PXP Safety offers a wide range of signage solutions that comply with AS 1319 and WHS standards, ensuring they meet the requirements for Australian workplaces. Their Restricted Area and No Entry signs are made from durable aluminium with UV protection and solvent outdoor printing, designed to meet AS 1319 luminance standards. This ensures that the signs remain effective and legally compliant.
For workplaces with specific needs, PXP Safety provides custom signage options. These can include tailored dimensions, messaging, or branding to address unique safety requirements while adhering to Australian regulations.
For outdoor environments like car parks or construction sites, aluminium signs are a durable and long-lasting choice. For indoor or temporary applications, alternative materials offer flexibility while maintaining compliance. To keep signage effective, it’s recommended to conduct regular audits every 6 to 12 months to identify any signs that may need replacing due to wear or changes in the site layout.
Conclusion
Understanding the difference between Restricted Area and No Entry signs is essential for maintaining a safe and legally compliant workplace. No Entry signs are used to completely prohibit unauthorised access, while Restricted Area signs allow access only to authorised individuals. This distinction plays a crucial role in managing workplace traffic, safeguarding sensitive equipment, and reducing the risk of accidents in hazardous areas.
In Australia, workplace safety laws mandate clear and compliant signage. Signs must adhere to the AS 1319 standard, which ensures they are easily recognisable nationwide. This includes the use of specific colours and symbols to effectively communicate risks and restrictions.
Proper placement and maintenance are key to ensuring the effectiveness of your signage. Signs should be installed at eye level and inspected regularly for visibility and durability. Neglecting damaged or faded signs can compromise safety and lead to non-compliance with legal requirements.
For reliable solutions, PXP Safety offers durable aluminium signs with UV protection and outdoor-grade printing. Plus, they provide free shipping on Australian orders over $100, making compliance both accessible and convenient.
FAQs
Can I use a Restricted Area sign instead of a No Entry sign?
Choosing between a Restricted Area sign and a No Entry sign comes down to the situation and the message you need to convey.
- Restricted Area signs are used to highlight that access is limited to authorised personnel only. These signs focus on safety and security by clearly stating that only specific individuals are allowed in the area.
- No Entry signs, on the other hand, communicate a complete prohibition of entry. They don’t explain why access is denied, focusing solely on preventing anyone from entering.
The key is to decide whether you want to emphasise outright prohibition or control access for authorised individuals. This ensures your signage is clear and helps maintain compliance.
Which sign do I need to meet AS 1319-1994?
To meet the requirements of AS 1319-1994, it’s important to pick a sign that matches the specific restriction or hazard. For example:
- Use a Restricted Area sign to indicate areas where access is limited to authorised personnel only.
- Opt for a No Entry sign to clearly prohibit access to unauthorised individuals.
Both signs must adhere to the standard’s guidelines for visibility, durability, and clear messaging. Ensure the chosen sign suits the context and maintains compliance with the standard.
Where should these signs be placed for best visibility?
To ensure maximum visibility, place restricted area and no entry signs at all access points leading to the areas they regulate. These include entrances, exits, and doors to restricted zones. Signs should be positioned at eye level, in areas with good lighting, and free from any obstructions that might block their view.
It’s also important to think about the flow of traffic. Signs should be placed where they can be noticed before someone reaches the restricted area. This helps promote both safety and compliance effectively.
Related Blog Posts
You may also be interested in
FAQs About Workplace Safety Signs in Australia
AS 1319 sign types, placement, materials and maintenance for workplace safety and WHS compliance in Australia.
How to Spot Workplace Signage Gaps
Audit your workplace for missing, faded or non‑compliant signs under AS 1319 to reduce incidents and avoid WHS fines.
Symbol Design: Global Standards Explained
Explains ISO 7010 and ISO 3864: standard symbols, colours and sizing for clear, language‑free safety signage and AU compliance.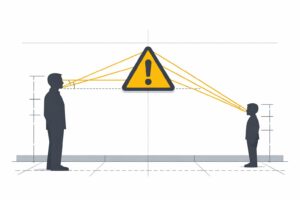
Hazard Sign Visibility Planner
Plan hazard sign placement for max visibility with our free tool. Ensure safety by finding the best spot, height, and angle—try it now!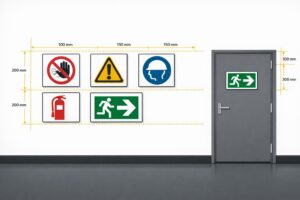
Australian Safety Sign Compliance Guide
Ensure your workplace meets Australian safety sign standards with our easy guide. Get tailored signage advice for compliance today!