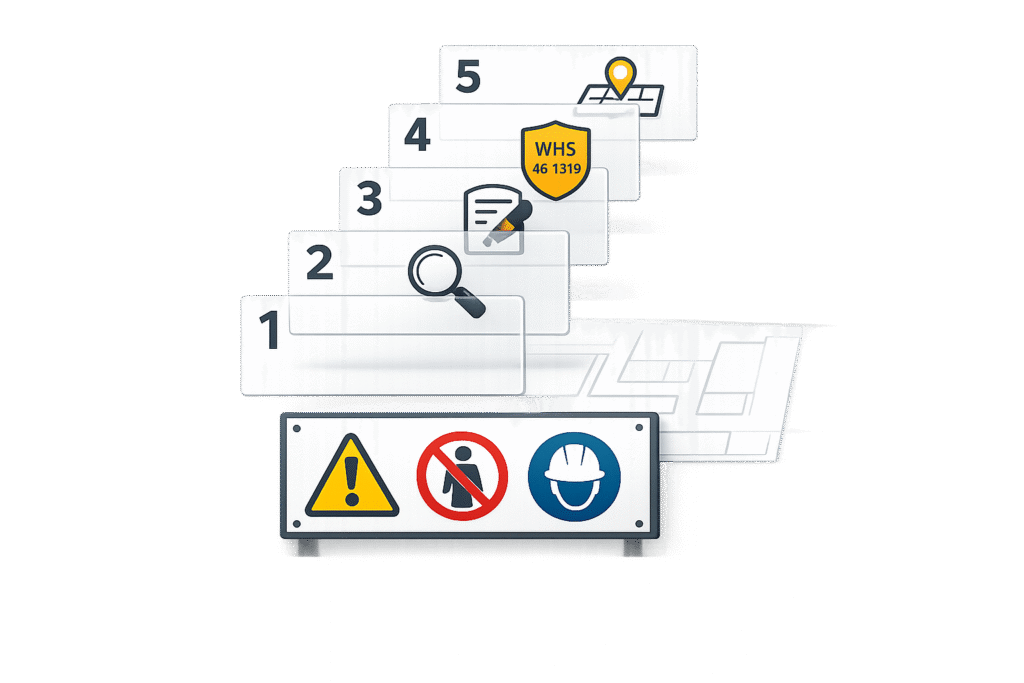
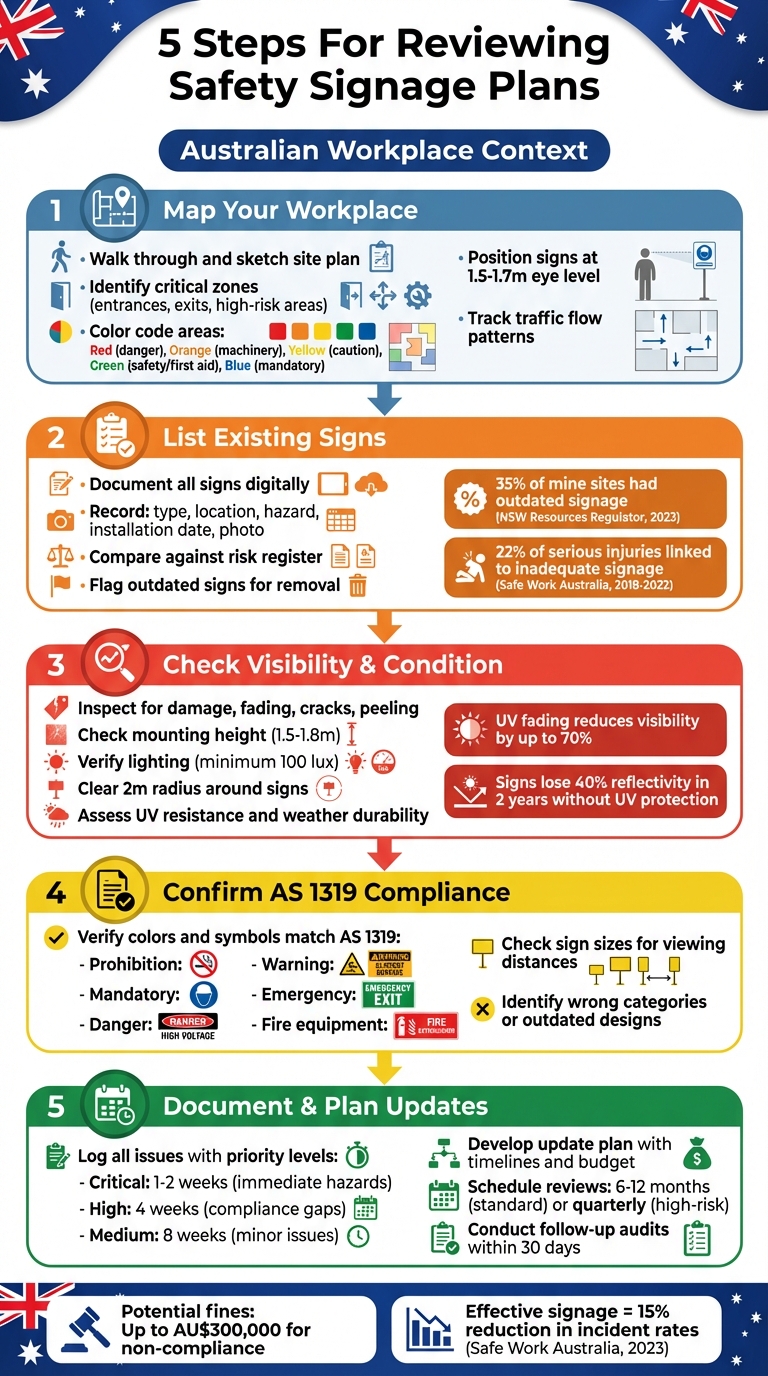
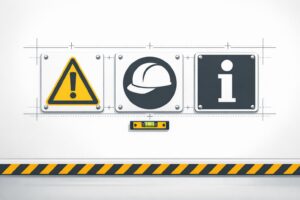
5 Steps For Reviewing Safety Signage Plans
Faded or damaged safety signs are a major hazard. In Australia, where UV exposure and tough weather conditions are common, maintaining proper safety signage is critical – not just for compliance with WHS regulations and AS 1319 standards, but to prevent accidents and avoid fines that can reach up to AU$300,000.
Here’s a quick breakdown of the process to review and update your safety signage effectively:
- Map your workplace: Identify key zones and hazards, ensuring signs are visible and placed correctly.
- Take stock of existing signs: Record all signs, check for outdated or irrelevant ones, and update your inventory.
- Inspect condition and placement: Look for damage, fading, or poor visibility, and ensure signs are positioned at eye level with proper lighting.
- Ensure compliance: Verify that all signs meet AS 1319 standards for colours, symbols, and placement.
- Document and plan updates: Prioritise issues, assign tasks, and schedule routine reviews to maintain standards.
5-Step Safety Signage Review Process for Australian Workplaces
OSHA Safety Signs: Where Should Safety Signs Be Placed
sbb-itb-9950c92
Step 1: Map Your Workplace and Identify Key Zones
Start by walking through your workplace and sketching a detailed site plan. Pay close attention to sightlines from roads, footpaths, and entry points [10]. A sign that can’t be easily seen won’t serve its purpose [8], so take note of wall surfaces, mounting heights, and areas where illuminated or digital signs may be needed near power sources [10].
Identify Key Areas
Highlight critical zones such as entrances, exits, production areas, high-risk locations near electrical panels or chemical storage, storage rooms, and outdoor spaces. These are the spots where signage is crucial. Place signs as close as possible to the hazards they address [11]. For instance, a "Danger: High Voltage" sign should be directly on or next to the electrical panel, not farther away down a hallway. Use colour coding on your map to categorise areas:
- Red: Immediate danger
- Orange: Machinery warnings
- Yellow: Caution areas
- Green: Safety and first aid locations
- Blue: Mandatory actions [11]
This step creates a clear foundation for understanding movement patterns in the workplace.
Assess Traffic Flow and Activities
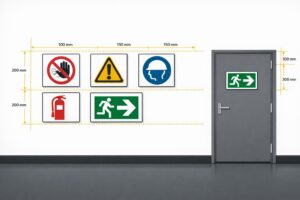
Track the movements of both people and vehicles to ensure signs are placed ahead of potential hazards [10][11]. Identify any obstacles, such as furniture or equipment, that might block a sign’s visibility [8][11]. Signs should be positioned at standard eye level (1.5–1.7 metres) to make them easy to spot [11]. Keep a detailed inventory by documenting each sign’s image, location, text, and purpose in a spreadsheet [9]. This record will help you spot any missing or redundant signs as you move forward with the process.
Step 2: List Existing Signs and Check Their Relevance
Once you’ve mapped out your workplace layout, the next task is to take stock of all the safety signs already in place. This step creates a clear and organised record of your current signage, helping you identify anything that’s missing, outdated, or no longer needed.
Record Sign Types and Locations
Start by documenting every sign in a digital inventory. Include details such as the type of sign (e.g. danger, mandatory, prohibition, fire equipment, first aid, or parking), its exact location (e.g. "near forklift zone, 2 metres height"), the hazard or instruction it addresses, the installation date (if available), and a photo to capture its condition.
For example, a 2023 audit by the NSW Resources Regulator found that 35% of mine sites had outdated signage that no longer reflected current operations, prompting necessary updates [1]. Organising your inventory by zone or category can make it much easier to spot any gaps or duplicates as you review.
Check for Outdated or Unnecessary Signs
Compare your inventory against your updated risk register and current workplace operations. Signs can become irrelevant when hazards are removed, equipment is decommissioned, or processes change. For instance, if an area has been renovated and is no longer prone to wet floors, a "Wet Floor" sign in that space should be removed.
Engage with managers to understand any changes in renovations, equipment, or processes over the past 12–24 months that might impact the relevance of signage. Safe Work Australia has reported that inadequate or missing safety signage contributed to 22% of serious injury incidents in manufacturing sectors between 2018 and 2022 [1]. Outdated signs can create confusion and even undermine the trustworthiness of your entire safety system. Flag any signs tied to eliminated hazards, retired equipment, or discontinued processes for removal during your updates.
Step 3: Check Visibility, Condition, and Placement
Once your inventory is logged, it’s time to evaluate how effectively each sign performs in its actual environment. Even a sign that ticks all the compliance boxes can fail its purpose if it’s hard to see or if weather conditions impact its legibility.
Inspect for Damage or Fading
Check each sign for issues like cracks, dents, peeling laminates, graffiti, bent edges, or discolouration. Australia’s intense UV exposure is notorious for fading signs, which can make them hard to read from more than 5 metres away. In some situations, this can reduce visibility by up to 70% under poor lighting, increasing the risk of accidents [1][3]. For example, in 2022, a faded "Forklift Zone" sign in a Queensland warehouse contributed to a pedestrian collision. Similarly, corroded fire exit signs in a Melbourne factory caused delays during an emergency evacuation [12][2].
To ensure thorough inspection, use a checklist with photos, a torch, and even magnification to capture details. Digital tools, like SafetyCulture, can help by logging findings with timestamps and GPS coordinates, streamlining documentation for Australian workplaces [4][5].
Assess Visibility and Accessibility
Make sure critical signs are mounted at eye level – typically between 1.5 and 1.8 metres above ground for standing workers. This placement ensures clear sightlines up to 10 metres, as specified by AS 1319, while also accommodating wheelchair users [6][7].
Use a lux meter to check lighting levels at different times of the day, aiming for at least 100 lux illumination. In dimly lit areas, retro-reflective materials or LED backlighting can help reduce misreads by up to 25% [1][3]. Keep the area around each sign clear within a 2-metre radius, use contrasting backgrounds, and place signs at key decision points like entrances to maximise visibility.
Check Suitability for Australian Conditions
Australia’s climate can be harsh on signage. High UV exposure, coastal salt, and temperatures ranging from -5°C to 50°C demand durable materials. Aluminium signs with UV-resistant coatings are ideal, as standard plastics can fade 50% faster outdoors, leading to compliance issues [12][2]. Safe Work Australia notes that 20% of outdoor signage failures are due to material degradation, which can result in fines of up to AU$300,000. Without proper UV protection, signs may lose 40% of their reflectivity within just two years [6][7].
Make sure your signs meet AS 1319 standards for fire ratings and can withstand wind speeds up to 150 km/h, especially in regions prone to bushfires or cyclones.
For durable options, PXP Safety provides aluminium signs with UV protection and outdoor-grade printing. Designed for tough Australian conditions, they also come with 5+ year warranties, making them suitable for both coastal and outback environments.
This step wraps up your physical inspection process, preparing you for the final documentation and compliance review.
Step 4: Confirm Compliance with Australian Standards
Once you’ve evaluated your signage inventory and its condition, the next crucial step is ensuring that every sign aligns with Australian standards. Any gaps in compliance can put your workplace at risk, both legally and in terms of safety.
Review AS 1319 Colour and Symbol Requirements
The AS 1319 standard specifies the exact colours, symbols, and shapes required for each type of safety sign:
- Prohibition signs: A red circle with a diagonal slash over a black symbol on a white background.
- Mandatory signs: A blue disc featuring a white symbol.
- Danger signs: The word "DANGER" in white text inside a red oval, which is set within a black rectangular header.
- Warning signs: A yellow equilateral triangle with a black border and symbol.
- Emergency information signs: Green backgrounds with white symbols or text, used for exits or first aid.
- Fire equipment signs: Red backgrounds with white symbols or text.
- Restriction signs: A red circle (without a diagonal slash) on a white background with black text.
It’s essential that colours and symbols match the AS 1319 specifications perfectly. Even minor deviations, like a faded red sign that appears pink, could render the sign non-compliant and in need of replacement. Additionally, ensure that the sign sizes are appropriate for their intended viewing distances.
Once the colours, symbols, and sizes are confirmed, it’s time to address common compliance challenges.
Identify Common Compliance Issues
When checking your signage, watch out for these frequent problems:
- Wrong sign categories: For instance, using a yellow warning sign instead of a red danger sign for critical hazards.
- Outdated designs: Older facilities often have signs that no longer meet current AS 1319 standards, especially if they haven’t been updated since the 1990s.
- Over-signage: Clustering too many signs in one area can lead to workers ignoring them due to "signage fatigue." Aim to consolidate information while staying compliant.
- Incorrect placement: Signs should be positioned as close as possible to the hazard and within the workers’ direct line of sight.
- Misapplication of AS 1319: This standard applies strictly to workplace environments and does not cover pipe labels, chemical containers, or public road traffic signs.
For expert help with safety signage compliance in Australia, PXP Safety offers detailed guidance and solutions to ensure your workplace meets the necessary standards. [13]
Step 5: Document Findings and Plan Updates
After wrapping up your compliance checks, it’s time to turn your observations into actionable records. Proper documentation creates a clear audit trail, showcasing your diligence and supporting ongoing safety improvements. Use the findings from your compliance checks to guide this crucial step.
Record Issues and Set Priorities
Start by documenting every issue identified during your inspections. Use a consistent template to log details such as the sign’s location, condition (e.g., damaged, faded, or missing), compliance status, recommended actions, date, reviewer, and specifications like type, size, and material[1].
Next, prioritise these findings using a risk-based approach. Categorise the issues into three key levels:
- Critical: Immediate hazards, such as missing mandatory signs or severely damaged signs in high-traffic areas. These require action within 1–2 weeks.
- High: Compliance gaps that risk regulatory penalties. Address these within 4 weeks.
- Medium: Minor visibility or aesthetic issues that should be resolved within 8 weeks[1].
Document the reasoning behind each priority to show that your organisation has applied a structured and defensible method to safety management[1].
Develop an Update Plan
With priorities in place, outline a clear plan to address each issue. This update plan should include:
- Specific signs requiring action
- Replacement timelines based on priority levels
- Budget allocation
- Responsible personnel
- Supplier selection criteria[1]
When choosing materials for replacements, factor in insights from your earlier condition assessments. For instance, PXP Safety offers aluminium options with UV protection that are designed to handle harsh weather. While these may have higher upfront costs, their durability can reduce the need for frequent replacements, offering long-term value[14].
Assign responsibility for each task to specific individuals or teams, and set clear deadlines with milestone dates (e.g., "purchase signs by 15 May, install by 30 May")[1]. Integrate these tasks into your project management systems to ensure visibility and accountability throughout the process[1].
Schedule Future Reviews
To maintain compliance and ensure continued effectiveness, establish a regular review schedule. Most organisations find a 6 to 12-month review cycle works well, but higher-risk environments might require more frequent checks, such as quarterly or semi-annual reviews. This is especially important in workplaces with high staff turnover, facilities undergoing renovations, or areas exposed to harsh conditions like coastal regions with salt spray[1].
Additionally, schedule immediate reviews after incidents, near-misses, inspections, or significant process changes. Use calendar reminders, integrate these reviews into your WHS management systems, and conduct follow-up audits within 30 days of updates to confirm their effectiveness[15].
Conclusion
Regularly reviewing safety signage is a practical way to minimise workplace risks and protect your team. By spotting hazards early and ensuring compliance with AS 1319 standards, you can avoid hefty fines, which can reach up to AU$300,000. A 2023 report by Safe Work Australia found that effective signage was linked to a 15% reduction in incident rates across high-risk industries like construction, demonstrating the tangible benefits of staying proactive with signage management.[1]
Proper signage doesn’t just meet legal obligations – it actively enhances safety outcomes. Take, for instance, a Queensland manufacturing facility that conducted annual signage reviews. These reviews uncovered faded emergency exit signs, which were promptly replaced to meet AS 1319 standards. The result? A 25% improvement in evacuation times during drills, highlighting how regular maintenance can directly prevent incidents and improve response times.[16] Starting with high-quality signage ensures fewer issues down the line.
Durable and compliant signage plays a key role in maintaining safety. Choosing materials that withstand Australia’s harsh conditions – like UV-protected aluminium signs with outdoor-grade printing – reduces the need for frequent replacements. Companies like PXP Safety specialise in providing signage designed for environments ranging from salty coastal areas to intense inland heat. Whether you need danger signs, fire equipment markers, or mandatory signage, they offer solutions tailored to your site’s compliance requirements.
To keep safety standards high, make signage reviews a regular part of your WHS calendar. Schedule these checks quarterly or bi-annually, assign a dedicated safety officer to oversee the process, and monitor key metrics like incident rates and compliance scores. By shifting from reactive to proactive signage maintenance, you can create a safer workplace while protecting both your team and your business.
FAQs
How often should we review safety signage?
Safety signage needs regular reviews to ensure it remains compliant, visible, and effective. Conducting frequent audits and inspections is crucial to align with Australian standards like AS 1319 and WHS regulations. Although there’s no strict rule on how often this should be done, it’s generally advised to review signage at least once a year or whenever workplace hazards or conditions change. These periodic checks help ensure safety measures stay up to date with any changes in requirements or the environment.
What’s the quickest way to check AS 1319 compliance?
To quickly ensure compliance with AS 1319, the best approach is to carry out a safety sign audit. This process involves assessing your safety signs for key factors like visibility, legibility, proper positioning, and alignment with the standard’s specifications for colours, sizes, and symbols. Check that all signs are correctly placed and in good condition, then record any required updates or adjustments to guarantee they meet AS 1319 standards.
When should we replace a sign instead of cleaning it?
If a sign is severely damaged or fails to meet current safety standards, it’s time for a replacement. While minor problems like scratches, dirt, or slightly bent frames can often be fixed, more serious issues demand action. Replacing such signs ensures safety is upheld and that all regulatory requirements are met.
Related Blog Posts
You may also be interested in
FAQs About Workplace Safety Signs in Australia
AS 1319 sign types, placement, materials and maintenance for workplace safety and WHS compliance in Australia.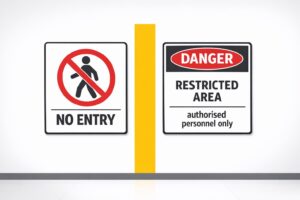
Restricted Area Signs vs. No Entry Signs
Compare No Entry and Restricted Area signs in Australian workplaces — meanings, design differences and AS 1319 compliance.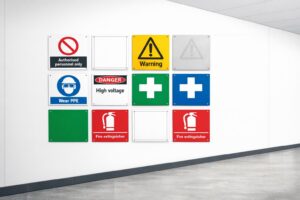
How to Spot Workplace Signage Gaps
Audit your workplace for missing, faded or non‑compliant signs under AS 1319 to reduce incidents and avoid WHS fines.
Symbol Design: Global Standards Explained
Explains ISO 7010 and ISO 3864: standard symbols, colours and sizing for clear, language‑free safety signage and AU compliance.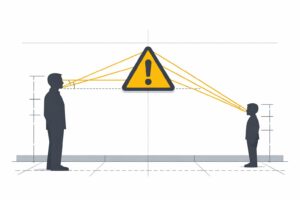
Hazard Sign Visibility Planner
Plan hazard sign placement for max visibility with our free tool. Ensure safety by finding the best spot, height, and angle—try it now!