How To Conduct a Safety Sign Audit
Safety sign audits in Australia are essential for workplace safety and compliance. Regular inspections ensure signs remain visible, readable, and meet the AS 1319:1994 standards, protecting businesses from fines, legal issues, and unsafe conditions. Here’s what you need to know:
- Why audits matter: Australia’s weather can fade or damage signs in 3–7 years. Missing or unreadable signs can lead to injuries and fines over $100,000.
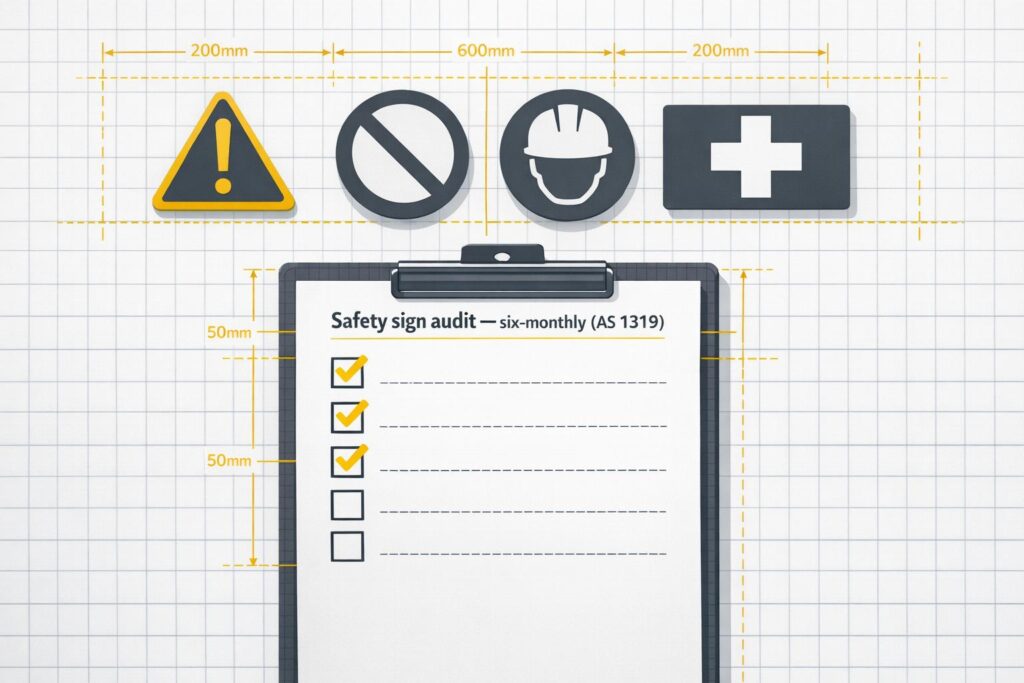
- Audit frequency: Conduct audits every six months or after changes like new equipment or layout updates.
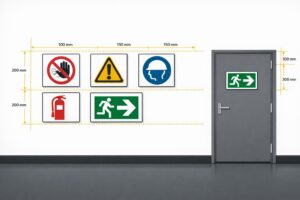
- Key compliance points: Signs must meet AS 1319 standards, including proper placement (1.5–2.1 metres high), durability, and visibility under various conditions.
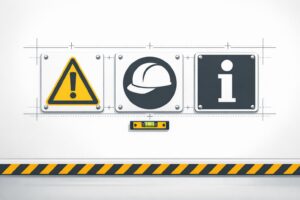
- Categories to check: Danger, Prohibition, Mandatory, Warning, Emergency Information, Fire, and Restriction signs.
- Steps to audit: Use a site map, inspect placement and condition, document findings, and address issues like faded or obstructed signs immediately.
Regular audits not only ensure compliance with the Work Health and Safety Act but also create a safer environment for everyone.
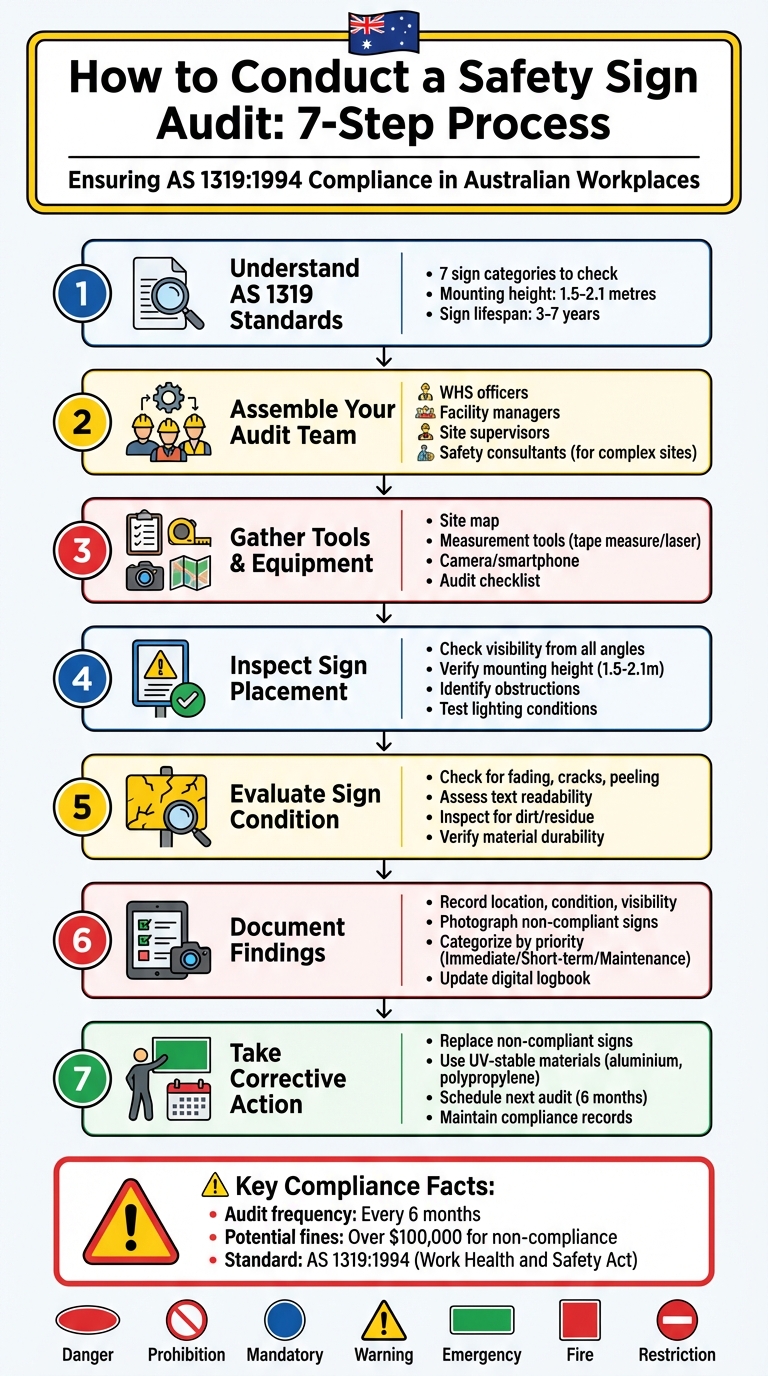
7-Step Safety Sign Audit Process for Australian Workplaces
HOW TO DO A SAFETY AUDIT / SIGNAGES – QA & QC
sbb-itb-9950c92
Australian Safety Sign Standards Explained
The AS 1319-1994 standard outlines how safety signs in Australia should look, where they should be placed, and what messages they must convey. Released on 18 April 1994, this 35-page document provides detailed guidance on colours, shapes, symbols, and positioning to ensure hazards and instructions are easily understood. Its primary goal is to "regulate and control safety related behaviour" [4]. A solid understanding of these standards is crucial for accurate workplace audits.
Compliance with these standards is required under the Work Health and Safety Act. Business owners and WHS officers are responsible for ensuring all safety signage aligns with AS 1319 requirements. Non-compliance can lead to penalties, especially if inadequate signage contributes to avoidable incidents [1]. The AS 1319-1994 document is available for purchase at $160.69 (including GST) [3]. The standard categorises essential safety signs into specific groups, each serving a distinct purpose.
Categories of Safety Signs
AS 1319 classifies workplace safety signs into seven categories, each designed with specific colours and shapes for instant recognition:
- Prohibition signs: These feature a red circle with a diagonal slash on a white background, indicating prohibited actions (e.g., no smoking).
- Mandatory signs: A blue circle on a white background signals actions that must be taken, such as wearing protective gear.
- Danger signs: These display the word "DANGER" in white text on a red oval within a black rectangle, used for high-risk hazards like high voltage.
- Warning signs: A black triangle on a yellow background highlights non-life-threatening risks, such as slippery surfaces or forklift zones.
- Emergency Information signs: These use a green background with white text or symbols to show locations of exits, first aid kits, or safety showers.
- Fire signs: With red backgrounds and white symbols, these identify fire extinguishers, hoses, and alarm points.
- Restriction signs: A red circle without a diagonal slash indicates specific limits, such as speed restrictions [4].
Compliance Requirements Checklist
AS 1319 provides flexibility in materials and sizes but stresses that signs must suit their environment and remain clearly visible. Under standard lighting, symbols should measure at least 15 mm per metre, and uppercase text should be 5 mm per metre. In dim lighting, these dimensions should increase by 50% to ensure readability. Signs should be mounted 1.5–2.1 m above the ground and placed against contrasting backgrounds for maximum visibility.
For outdoor use, materials like aluminium or polypropylene are recommended due to their resistance to fading and weathering. Regular maintenance is also essential – keep signs clean, well-lit, and unobstructed to avoid common audit failures, such as faded text or blocked visibility [1][4].
Planning Your Safety Sign Audit
When it comes to ensuring compliance with Australian safety sign standards, a well-planned audit is crucial. Proper preparation is the foundation of a successful audit. Without the right tools, team, and a clear strategy, there’s a risk of overlooking hazards or failing to keep accurate records.
Tools and Equipment You’ll Need
Start with a detailed site map that highlights every area where safety or instructional signs should be located. This ensures no space – like storage rooms or loading docks – is accidentally missed [1]. Bring measurement tools, such as a tape measure or laser distance finder, to confirm that signs are installed within the standard viewing height of 1.5 to 2.1 metres [1]. A camera or smartphone is essential for documenting signs that need attention, like those with faded text, damage, or obstructions [5][2].
To keep everything organised, use a structured audit tool or checklist. These are often available in editable formats, making it easy to log findings consistently [5][1]. Photographs are particularly useful for monitoring wear and tear over time.
Choosing Your Audit Team
Under the Work Health and Safety Act, business owners and WHS officers are responsible for ensuring signage compliance [1]. Typically, facility managers or safety officers handle the physical inspection and maintain the audit records [1]. For more complex environments, such as mine sites or large industrial facilities, it’s wise to involve experienced WHS consultants. They can provide independent assessments of sign placement, size, and material durability [6].
Site supervisors should also be part of the process. Their knowledge of daily operations can help identify areas prone to "sign blindness" or new hazards that may require updated signage [6]. Assign one person to update the audit logbook and follow up on corrective actions, such as ordering replacements or repositioning signs [1]. Once your team is assembled, create a detailed checklist to guide the inspection.
Crafting Your Audit Checklist
Your checklist should cover the seven sign categories outlined in AS 1319: Danger, Prohibition, Mandatory, Warning/Hazard, Emergency Information, Fire, and Traffic signs [1][7]. For each sign, note its type, location, mounting height, condition, and compliance with AS 1319. Pay attention to issues like fading, poor lighting, or obstructions [1][6]. Signs should be placed at entry points to work areas, not hidden inside them [6].
Remove duplicate or outdated signs that might create visual clutter and confusion [1]. Outdoor signs should be made from durable, weather-resistant materials like UV-stable aluminium or polypropylene to prevent damage from the elements [1][2]. Consistency is key – use uniform symbols and fonts across the site to minimise confusion and meet WHS standards [2].
"A workplace signage audit ensures every safety, warning, and directional sign complies with Australian Standard AS 1319 and remains clearly visible to staff and visitors." – K2K Signs [1]
Aim to conduct audits at least twice a year, or immediately after any significant structural or operational changes [1]. Keeping digital records of these audits can also help demonstrate compliance during inspections by WHS regulators [1].
Performing the Physical Sign Inspection
With your team and checklist in hand, it’s time to physically inspect every safety sign on-site. This step is crucial for identifying signs that are missing, damaged, or incorrectly positioned, as these issues can directly impact workplace safety.
Checking Sign Placement and Visibility
Begin by ensuring each sign is installed within the standard viewing range of 1.5 to 2.1 metres from the floor [1]. Signs in high-traffic areas should be mounted at eye level and visible from all relevant directions [2]. Walk through the site from various angles to identify any blind spots where hazards might go unmarked [1].
Look out for anything that might block a sign’s visibility. This includes machinery, equipment, or structural elements that could obscure the sign’s message [2]. Assess visibility under different lighting conditions – both daylight and low-light scenarios [1]. In poorly lit areas, check if signs need reflective finishes, high-contrast designs, or photoluminescent materials to meet compliance standards [1][2]. Lastly, ensure that only the most current and clear signs are displayed [1].
Once placement and visibility are confirmed, shift your focus to the condition and readability of each sign.
Evaluating Sign Condition and Readability
Examine each sign for physical damage like peeling, cracks, or issues with mounting [2]. In Australia, UV exposure, rain, and humidity often cause colour fading, which can make signs non-compliant with AS 1319 colour standards [2]. Text and pictograms must remain clear and easy to read – headers like "DANGER" should be legible from at least 1.5 metres away [9].
"A sign that’s blocked, faded, or too small is as good as no sign at all." – Aaron Gray, Published Author [8]
Check for dirt, dust, or chemical residue that could obscure the sign’s message [8]. Self-adhesive signs should be inspected for lifting edges or bubbling [9]. Confirm that the sign’s size is suitable for its intended viewing distance [9]. Most safety signs have a functional lifespan of 3–7 years, depending on environmental conditions, and may need replacement as they age [2].
Recording Findings in an Audit Table
Organise your findings in a detailed audit table to keep track of issues and corrective actions. This method ensures a structured approach and helps demonstrate compliance during WHS inspections. Your table should include columns for Sign Type, Location, Presence (Yes/No), Condition, Visibility, and Action Required. For example:
- A "Danger: High Voltage" sign in the electrical room might be present but faded, requiring replacement.
- A "Fire Extinguisher" sign near the loading dock could be obstructed by pallets, needing the pallets to be moved and the sign repositioned.
Detailed records, whether written or digital, are essential for tracking and addressing safety concerns promptly.
| Sign Type | Location | Presence | Condition | Visibility | Action Required |
|---|---|---|---|---|---|
| Danger: High Voltage | Electrical Room | Yes | Faded text | Good | Replace sign |
| Fire Extinguisher | Loading Dock | Yes | Good | Obstructed by pallets | Relocate pallets and reposition sign |
| Mandatory: Wear Hard Hat | Warehouse Entry | No | N/A | N/A | Install new sign |
| Warning: Forklift Operating | Warehouse Aisle 3 | Yes | Cracked panel | Poor lighting | Replace and add reflective finish |
| No Smoking | Staff Break Area | Yes | Good | Good | No action |
Recording Audit Results and Identifying Non-Compliance
Once you’ve completed the physical inspection, the next step is to document your findings and pinpoint any compliance issues.
Compiling Your Audit Report
Organise your inspection results into a clear, structured report – this could be a table or a digital logbook [1]. Use your checklist to categorise findings by safety areas, such as Fire & Emergency, Mandatory PPE, Warning, and Prohibition, to help prioritise actions based on the level of risk [1][5].
Your report should include essential details like the sign’s location (clearly marked on a site map), its compliance status (Yes/No), the specific issue (e.g., faded text or obstruction), and the corrective action needed [1][5]. It’s important that the assigned officer keeps the logbook updated regularly [1]. Maintaining digital records of all audits is crucial for showing a compliance history during official WHS inspections or legal proceedings [1].
Identifying Non-Compliant Areas
Start by addressing the most critical safety risks. Missing signs for "PPE Required" or "Emergency Exit" are among the most frequent reasons for failing audits and should be corrected immediately [2].
"A missing ‘PPE Required’ or ‘Emergency Exit’ sign can be all it takes to fail an audit" [2].
Group your findings into three priority levels: Immediate (emergency and fire safety signs), Short-term (mandatory PPE and high-risk warnings), and Maintenance (minor issues like slightly faded signs) [1][2]. Use your site map to pinpoint locations where required signs are completely absent, as these pose a higher regulatory risk compared to signs that are simply worn [1]. Pay close attention to "home-printed" signs or outdated symbols, as these often fail to meet AS 1319 standards [2].
Neglected or missing signs can lead to penalties under the Work Health and Safety Act, particularly if they contribute to avoidable incidents [1].
Taking Corrective Action
With the audit results in hand, the next step is to address any non-compliance swiftly. Identifying issues is only half the battle; resolving them and ensuring they don’t recur is key to maintaining a safe and compliant workplace.
Replacing or Upgrading Non-Compliant Signs
Start by ordering replacement signs that meet the AS 1319:1994 standards [1][2]. Outdated symbols or materials can compromise safety and lead to failed audits, so it’s essential to use signs that meet these specifications.
For durability, especially in outdoor or harsh conditions, opt for materials like aluminium, polypropylene, or ACM (Aluminium Composite Material). These materials, paired with high-quality vinyl, can endure UV exposure, rain, and humidity, reducing the need for frequent replacements [1][2].
Placement is equally important. Install signs at a height of 1.5–2.1 metres in locations free of obstructions [1][2]. In poorly lit areas, such as warehouses or underground car parks, consider reflective or photoluminescent finishes to ensure visibility during power outages [1][2]. Also, remove any redundant or conflicting signs to maintain clear and consistent messaging across the site [1][2].
For Australian workplaces, PXP Safety offers a range of compliant signage crafted from robust aluminium with UV-protective film and outdoor-grade printing. They also provide custom sign options for unique hazards, ensuring compliance with AS 1319 while addressing specific workplace needs [2].
Once compliant signs are installed, the focus should shift to maintaining them over time.
Setting Up a Regular Maintenance Schedule
After replacing non-compliant signs, establish a strict maintenance routine to ensure ongoing compliance. Conduct a full audit of signage every six months [1]. Supplement this with monthly or quarterly spot-checks during regular workplace inspections to catch any issues early [2]. Additionally, any changes to the site layout, installation of new machinery, or updates to procedures should trigger an immediate inspection [1].
Assign a WHS manager to oversee the maintenance schedule and keep detailed records. Use a logbook or digital system to document audits, findings, and corrective actions. These records are critical for demonstrating compliance during official WHS inspections and can serve as legal protection [1]. During routine checks, look for signs of fading, peeling, cracking, or physical damage. Ensure that signs are not obstructed by equipment and remain relevant to their specific areas [1][2].
Conclusion
Carrying out a safety sign audit isn’t a one-time task – it’s an ongoing effort to maintain workplace safety and meet legal obligations. By sticking to the steps outlined in this guide, you can ensure your signage complies with AS 1319:1994, stays clear and readable, and reflects the latest workplace hazards and procedures. To make this process seamless, integrate these steps into a continuous quality assurance program.
Start by understanding the standards, assembling the right team, and planning your audit with the necessary tools. Check the condition, placement, and visibility of every sign, document your findings in detail, and address any issues promptly. As K2K Signs explains, "A signage audit keeps your site legally compliant and ensures all safety messages remain visible and relevant" [1].
Given that signs typically endure for 3–7 years in tough conditions [2], regular six-monthly audits, along with spot-checks after any changes, are crucial.
Accurate record-keeping is the backbone of any compliance strategy. Assign a WHS officer to oversee the audit schedule and maintain meticulous records. This documentation is invaluable during inspections and serves as evidence of your dedication to safety. When signs need replacing, opt for UV-stable materials that can handle Australia’s harsh climate – this reduces the need for frequent replacements. For compliant and durable replacements, PXP Safety provides customisable solutions tailored to Australian workplaces.
A well-maintained audit program does more than ensure compliance. It helps prevent injuries, avoids fines, and fosters a strong safety culture by keeping hazard awareness a priority for everyone on site.
FAQs
What signs are legally required in my workplace?
Workplaces in Australia are required to display certain signs to comply with safety regulations and ensure a secure environment. These include:
- Danger signs: Highlight immediate hazards that could result in serious injury or death.
- Fire equipment signs: Indicate the location of fire-fighting equipment like extinguishers and hoses.
- First aid emergency signs: Show the location of first aid kits and medical assistance points.
- Mandatory signs: Specify actions that must be followed, such as wearing protective gear.
- No smoking signs: Clearly mark areas where smoking is prohibited.
- Notice signs: Provide general information not related to safety, such as operational hours.
- Parking signs: Regulate parking spaces and restrictions.
- Prohibition signs: Indicate actions that are not allowed, like "No Entry" zones.
- Restricted signs: Mark areas with limited access, often requiring authorisation.
- Security signs: Warn about surveillance or restricted access for security purposes.
- Warning signs: Alert to potential hazards, such as slippery floors or low headroom.
These signs are a critical part of Australian workplace safety standards, helping to protect employees and visitors alike.
How do I determine the right sign size for viewing distance?
When deciding on the right sign size, think about how far away it needs to be read in your workplace. Signs meant to be seen from long distances should be larger to ensure they’re easy to read. Always check Australian safety standards and follow expert recommendations to ensure the size meets both visibility and compliance requirements. Pay close attention to the placement and viewing distance to make sure the sign is clear and noticeable from its intended vantage point.
When should I replace a safety sign versus clean or reposition it?
Safety signs must be replaced if they become faded, weather-worn, or unreadable, as this reduces their visibility and undermines both compliance and safety. However, if a sign is still in good condition but hard to see due to dirt or poor placement, cleaning or repositioning can resolve the issue. Conducting regular inspections is key to spotting signs that need attention, ensuring they continue to communicate safety messages effectively and meet compliance standards.
Related Blog Posts
You may also be interested in
FAQs About Workplace Safety Signs in Australia
AS 1319 sign types, placement, materials and maintenance for workplace safety and WHS compliance in Australia.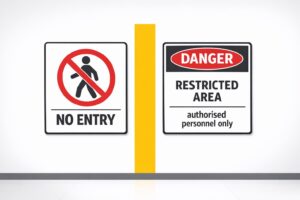
Restricted Area Signs vs. No Entry Signs
Compare No Entry and Restricted Area signs in Australian workplaces — meanings, design differences and AS 1319 compliance.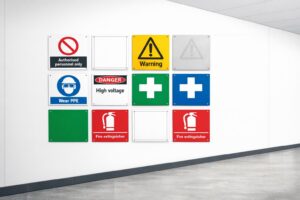
How to Spot Workplace Signage Gaps
Audit your workplace for missing, faded or non‑compliant signs under AS 1319 to reduce incidents and avoid WHS fines.
Symbol Design: Global Standards Explained
Explains ISO 7010 and ISO 3864: standard symbols, colours and sizing for clear, language‑free safety signage and AU compliance.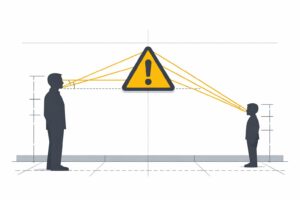
Hazard Sign Visibility Planner
Plan hazard sign placement for max visibility with our free tool. Ensure safety by finding the best spot, height, and angle—try it now!