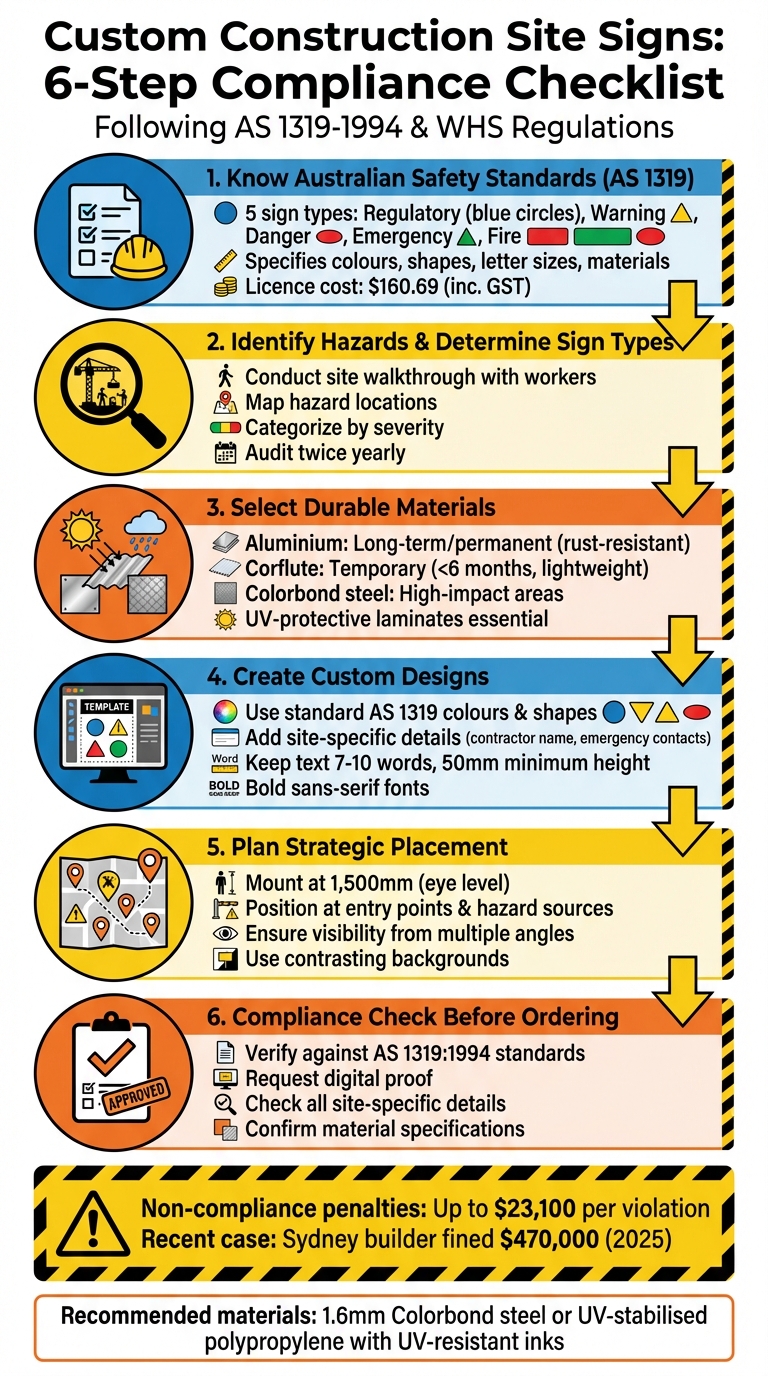
Checklist: Custom Construction Site Signs
Every construction site in Australia is unique and requires specific safety measures. Custom signs are not just helpful – they’re legally required under Work Health and Safety (WHS) regulations and Australian Standard AS 1319-1994. These signs must clearly communicate hazards, mandatory actions, and emergency information. Failing to comply can lead to fines of up to $23,100 or more, with recent cases like a Sydney builder fined $470,000 in 2025.
Here’s what you need to know:
- Understand AS 1319 Standards: Signs must follow strict rules for colours, shapes, and sizes to ensure clarity.
- Identify Hazards: Conduct a site walkthrough to determine risks and the essential safety signs needed.
- Choose Durable Materials: Use weather-resistant options like aluminium or Colorbond steel for long-term use.
- Customise for Your Site: Include specific details like contractor names and emergency contacts.
- Strategic Placement: Install signs at eye level near hazards and entry points for maximum visibility.
- Compliance Check: Double-check designs and placements against WHS and AS 1319 before ordering.
Custom signs ensure safety, meet legal requirements, and reduce risks on construction sites. Companies like PXP Safety offer compliant, durable solutions tailored for Australian conditions.
6-Step Process for Creating Compliant Custom Construction Site Signs in Australia
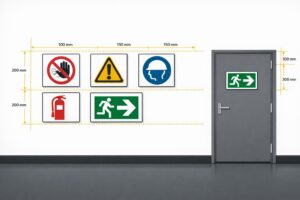
Health and Safety Signages for Construction Site
sbb-itb-9950c92
Step 1: Know Australian Safety Standards (AS 1319)
Before ordering custom safety signs, it’s crucial to understand AS 1319-1994, the Australian standard that governs their design. This standard specifies the required colours, shapes, letter sizes, and materials to ensure signs are clear, effective, and easy to read. These guidelines form the basis for all the detailed requirements discussed below.
What AS 1319 Covers
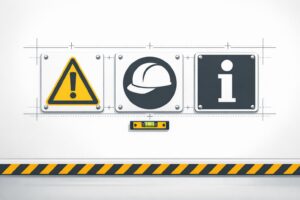
AS 1319-1994 categorises safety signs into five distinct types:
- Regulatory: Blue circles indicate mandatory actions, like "Hard hat must be worn."
- Warning: Yellow triangles highlight non-life-threatening hazards.
- Danger: A red oval with the word ‘DANGER’ warns of severe risks, such as high voltage.
- Emergency Information: Green backgrounds are used for exits and first aid points.
- Fire: Red backgrounds identify firefighting equipment [4].
The standard also outlines minimum letter sizes, symbol dimensions, and viewing distances to ensure signs can be recognised quickly. Depending on the lighting conditions, materials can range from non-retroreflective to retroreflective or even self-luminous. For those looking for full details, a single-user licence is available for $160.69 (including GST) [4].
Why Compliance Is Essential
Ignoring these standards can lead to legal issues and increase the risk of accidents due to unclear or poorly designed signs. Standardised signs are not just about ticking a box – they are critical for ensuring safety by providing clear, universal communication. Complying with AS 1319 safeguards workers, prevents confusion, and supports a safer work environment. It’s a vital part of maintaining an effective safety system.
Step 2: Identify Hazards and Determine Sign Types Needed
Once you’ve familiarised yourself with AS 1319, the next step is to assess your construction site for hazards and figure out what types of signs are required and where they should go. Start with a thorough site walkthrough, involving on-site workers to spot both obvious and hidden dangers. Look for risks like excavations, hazardous chemicals, isolation points, or overhead threats from scaffolding or cranes [6]. Make sure to document these findings immediately, as they’ll form the basis of your signage plan.
Create a map highlighting all the areas where safety, instructional, or directional signs are needed [7]. After mapping, categorise hazards based on their severity. For life-threatening risks, such as high voltage equipment or deep excavations, use Danger signs (red oval within a black rectangle). For less severe risks like slippery floors or forklift zones, opt for Warning signs marked by a yellow triangle [3][8].
Next, identify locations where specific safety actions are required. For instance, areas where hard hats, eye protection, or high-visibility vests must be worn should feature Mandatory signs with a blue circular design. Similarly, areas where certain actions are prohibited – like smoking near flammable materials – should display Prohibition signs [8]. Don’t forget to assess traffic routes, zones for mobile plant equipment, and pedestrian exclusion areas to determine the need for traffic control signs [7][8].
Emergency preparedness is equally important. Clearly mark fire extinguishers, first aid stations, emergency exits, and assembly points with Emergency Information signs (green background) or Fire signs (red background) [8]. Take into account environmental factors such as poor lighting or long distances, which might require larger or reflective signs to ensure visibility [3][7].
Keep a detailed record of your findings in a logbook or digital format. For each hazard, note its location, severity, and the type of sign required. This documentation is crucial for WHS audits and helps maintain compliance with AS 1319 [7]. Make it a point to conduct formal signage audits at least twice a year, or whenever there are changes to site layouts, machinery, or procedures. Remove outdated or duplicate signs to minimise visual clutter and prevent signage fatigue. Regular audits are key to keeping signage clear and effective [7].
Step 3: Select Materials That Last
When choosing materials for construction signage, it’s crucial they can handle Australia’s challenging weather conditions while also complying with AS 1319 durability standards. Subpar materials can deteriorate quickly, leading to non-compliance and potential fines of up to $23,100 [2].
Recommended Materials
Aluminium is the best option for long-term or permanent signage. It’s resistant to rust, can endure extreme weather, and retains its strength over time. This makes it ideal for projects lasting several years or for permanent installations.
For temporary signage (lasting less than six months), Corflute (fluted plastic) is a practical choice. It’s lightweight, waterproof, and affordable, making it perfect for short-term uses like perimeter fencing or quick warnings where layouts might change frequently.
In areas prone to physical impacts or strong winds, Colorbond steel is an excellent option. Its durability and strength make it suitable for high-impact environments where signs may face damage from equipment or harsh conditions.
To combat fading from Australia’s intense sunlight, apply UV-protective laminates to all signs. Unprotected signs can fade within months, making safety messages unreadable. Combine this with solvent outdoor-grade printing, which offers resistance to both moisture and UV exposure. Companies like PXP Safety utilise aluminium with UV protection and outdoor-grade printing specifically tailored for Australian conditions, ensuring signs remain clear and compliant throughout your project.
Once durable materials are in place, the next step is to ensure your signs are highly visible and easy to read.
Make Signs Easy to See and Read
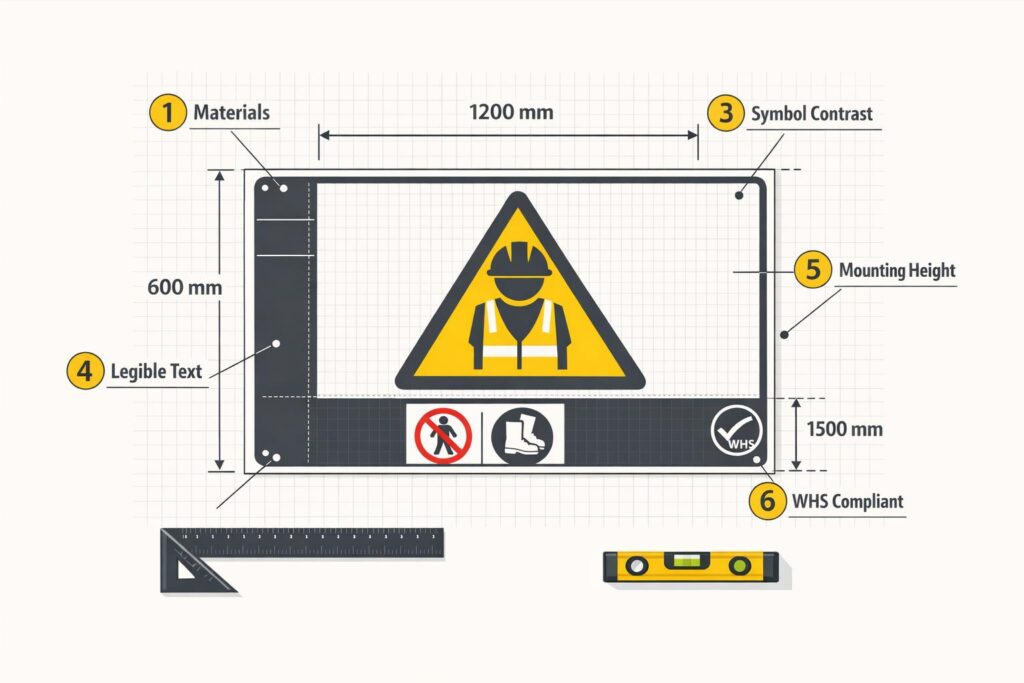
AS 1319 outlines specific requirements for sign sizing and visibility. For symbols, aim for a height of at least 15mm per metre of viewing distance, while uppercase text should be at least 5mm per metre. In areas with poor lighting, increase these dimensions by 50% [3]. For instance, a sign viewed from 10 metres away should have symbols no smaller than 150mm and text at least 50mm high – or 225mm and 75mm respectively in low-light conditions.
To enhance legibility, use high-contrast colour combinations like black on yellow or white on red [1][5]. Opt for bold, sans-serif fonts that are easy to read at a glance, and keep messages concise with clear pictographs. Place signs at eye level against a contrasting background, ensuring they’re not hidden by scaffolding, equipment, or vegetation [3]. Even the most durable signs won’t serve their purpose if workers can’t see or read them effectively.
Step 4: Create Custom Designs for Your Site
Design signs that address the specific hazards of your site while staying compliant with AS 1319. For example, a sign like "Demolition in Progress" can communicate unique risks effectively. However, it’s crucial to use the standard AS 1319 colours and shapes to ensure consistency and recognition.
Standard Colours and Shapes
AS 1319 outlines a clear visual language for safety signs:
- Blue circles for mandatory actions
- Yellow triangles for warnings
- Red ovals and circles for dangers and prohibitions
- Green for emergency information [9][10]
These elements should form the foundation of any custom design. The pictogram should take up a significant portion of the sign to ensure quick recognition in busy environments. Straying from these standard colours or shapes can lead to confusion, especially in high-pressure situations where workers rely on immediate visual cues for safety.
Once the standard elements are in place, you can add details that are specific to your site.
Add Site-Specific Details
Using the standard layout as a base, include concise details that address the unique risks or requirements of your site. Below the standard pictogram, add brief text that provides clarity about the hazard or action required. This could include:
- Contractor name
- Emergency phone number (including after-hours contact)
- Site office location
- Specific warnings related to current work
For instance, a blue mandatory sign might say, "John Doe Builders – Call 1800-XXX-XXX", while a yellow warning triangle could include text like, "Asbestos Removal in Progress – Authorised Personnel Only."
Keep the text short – 7 to 10 words – using bold, sans-serif fonts with a minimum height of 50 mm. This ensures readability from 5–10 metres. The text should be black and placed on the standard background colour, positioned directly below the pictogram. For entry signs with multiple messages, you can combine several standard symbols on one panel. For example, you might include mandatory PPE symbols alongside prohibition warnings to reduce clutter while still communicating all necessary rules.
PXP Safety offers custom sign creation using durable aluminium with UV protection, so your site-specific messages remain clear for the duration of your project.
Step 5: Plan Where to Place and Install Signs
Once you have compliant, durable, and clear signs tailored to your site’s needs, the next step is to install them strategically. Placement is critical – signs must be positioned where they can effectively alert workers to hazards. This means placing them directly at the source of danger, not in general areas far removed from the risk. For instance, a high-voltage warning sign hidden behind scaffolding or placed in a shadowed area won’t help someone approaching live equipment.
Where to Position Signs
Start at the site entrances. Display administrative and mandatory signs – like those outlining visitor sign-in procedures or PPE requirements – before anyone steps onto the site. Danger signs should be placed immediately next to life-threatening hazards, while emergency information signs must highlight the locations of first aid stations, emergency exits, and evacuation routes. Fire equipment signs should indicate the exact locations of alarms and firefighting tools.
For maximum visibility, mount signs at around 1,500 mm – roughly eye level – on a vertical plane. Ensure they stand out by using contrasting backgrounds. Signs should also guide vehicle movement and clearly mark exclusion zones.
To further improve safety, consider making signs visible from multiple directions.
Use Multiple Viewing Angles
Workers often approach hazards from various directions throughout their shifts, so signs need to be visible from all potential entry points. Mounting signs perpendicular to travel paths can significantly improve visibility. For areas with intersections or multiple entry points, conduct a site walkthrough from every direction to identify blind spots.
Traffic management signs require special attention. Place these signs far enough ahead of decision points to give drivers enough time to react. In areas with low lighting or during night shifts, consider using reflective or photoluminescent materials to ensure visibility from multiple angles, even in poor conditions.
Step 6: Check Compliance and Quality Before Ordering
Once you’ve planned your sign placements, it’s time to carry out a final quality and compliance check before placing your order. This step is essential to avoid costly errors and ensure your signs effectively protect workers while keeping you compliant with WHS regulations. A thorough review here connects your planning and design efforts to the ordering process seamlessly.
Verify Against WHS and AS 1319 Standards
Check your custom sign designs against the requirements of AS 1319:1994. Each type of sign has specific design rules:
- Prohibition signs: A red circle with a slash on a white background.
- Mandatory signs: A blue circle featuring a white symbol.
- Danger signs: The word "DANGER" in white, set within a red oval on a black rectangle.
- Warning signs: A yellow triangle with a black border and symbol.
Even the most durable sign is considered non-compliant if these design elements are incorrect. Additionally, make sure that text and symbol sizes meet the AS 1319 guidelines for viewing distances. Materials must also be appropriate for their intended use and adhere to the same standards.
Before production, request a digital proof and check all site-specific details. This includes ensuring that the Site Manager’s contact information, project names, and PPE requirements are accurate on custom multi-message boards. If you’re using custom logos or hazard symbols, confirm they are correctly integrated with AS 1319-approved pictograms.
Order Custom Signs from PXP Safety
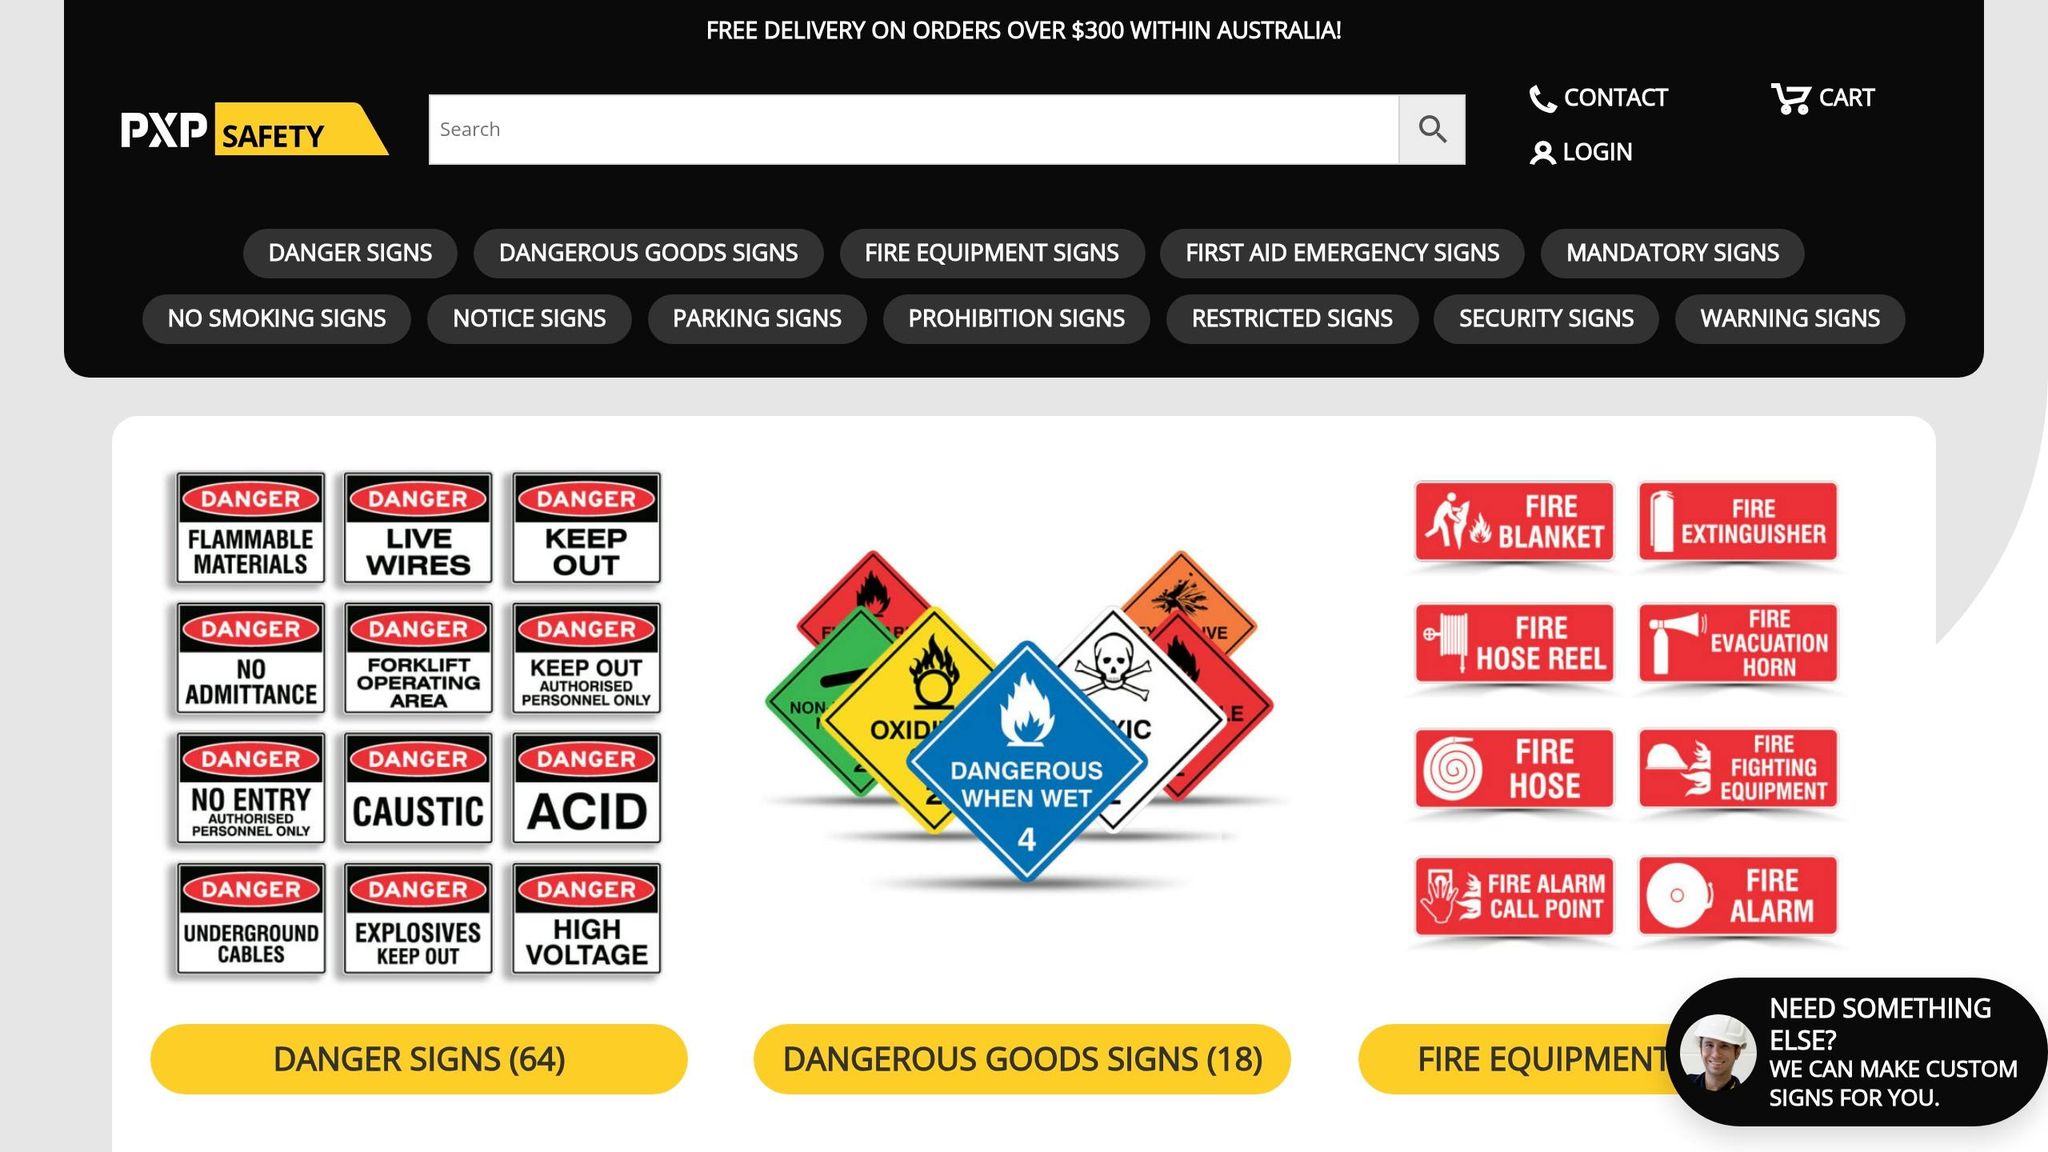
PXP Safety specialises in custom WHS signs that combine mandatory symbols with site-specific details. Their signs are made from weather-resistant materials like 1.6 mm Colorbond steel or UV-stabilised polypropylene, with UV-resistant inks and protective film to withstand Australia’s harsh conditions.
When placing your order, request rounded corners on metal signs to reduce injury risks during installation. Ensure signs come with pre-drilled holes or reinforced eyelets for secure mounting, especially in areas prone to high winds. For added convenience, PXP Safety also offers site audits to identify missing or non-compliant signs, taking the guesswork out of compliance and ensuring your construction site is fully covered.
Conclusion
Designing custom construction site signs that prioritise worker safety and ensure compliance involves a solid grasp of AS 1319 standards. Start by assessing the specific hazards present on your site and selecting robust materials like aluminium or heavy-duty plastic that can endure Australia’s tough outdoor conditions. Use proper colour coding: red ovals for danger, blue discs for mandatory actions, and yellow triangles for warnings.
Position your signs thoughtfully – place them at eye level (approximately 1.5 m from the ground) at entry points and near hazards, ensuring they are easily visible from various angles. Before finalising your order, double-check that every design aligns with WHS regulations and AS 1319 standards to avoid hefty penalties for non-compliance.
To simplify the process, PXP Safety provides tailored solutions with durable aluminium signs featuring UV protection and outdoor-grade printing. Their custom designs incorporate your site-specific details and mandatory symbols, ensuring they meet both AS 1319 and WHS requirements.
FAQs
Which signs are legally required on my construction site?
On a construction site, certain signs are legally required to ensure safety and compliance. These include hazard warnings, mandatory instructions, prohibition signs, and directional signs. Each sign must be clear, highly visible, and adhere to Australian standards like AS1319-1994. Following these guidelines not only promotes workplace safety but also helps avoid legal complications.
How do I choose the right sign size for the viewing distance?
When selecting a sign size, it’s essential to adhere to Australian safety signage standards. The size of the sign should ensure clear readability from the maximum distance it needs to be seen. For instance, a sign intended to be read from 10 metres away must be larger than one designed for close-up viewing.
For exact size requirements, consult Australian guidelines or work with a signage provider who can offer custom solutions tailored to your specific site requirements.
When should I use reflective or photoluminescent signs?
Reflective and photoluminescent signs are perfect for places with limited lighting or complete darkness. They help ensure that essential safety information and hazard warnings remain visible, enhancing safety during night-time or in low-visibility situations. These signs are especially helpful on construction sites, along emergency pathways, or in any setting where clear visibility is critical.
Related Blog Posts
You may also be interested in
FAQs About Workplace Safety Signs in Australia
AS 1319 sign types, placement, materials and maintenance for workplace safety and WHS compliance in Australia.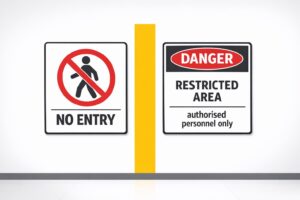
Restricted Area Signs vs. No Entry Signs
Compare No Entry and Restricted Area signs in Australian workplaces — meanings, design differences and AS 1319 compliance.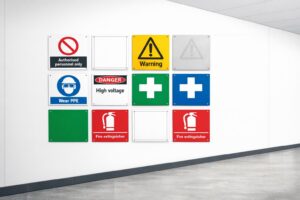
How to Spot Workplace Signage Gaps
Audit your workplace for missing, faded or non‑compliant signs under AS 1319 to reduce incidents and avoid WHS fines.
Symbol Design: Global Standards Explained
Explains ISO 7010 and ISO 3864: standard symbols, colours and sizing for clear, language‑free safety signage and AU compliance.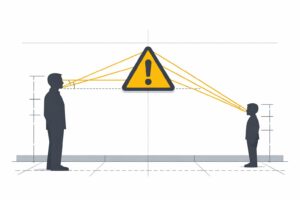
Hazard Sign Visibility Planner
Plan hazard sign placement for max visibility with our free tool. Ensure safety by finding the best spot, height, and angle—try it now!