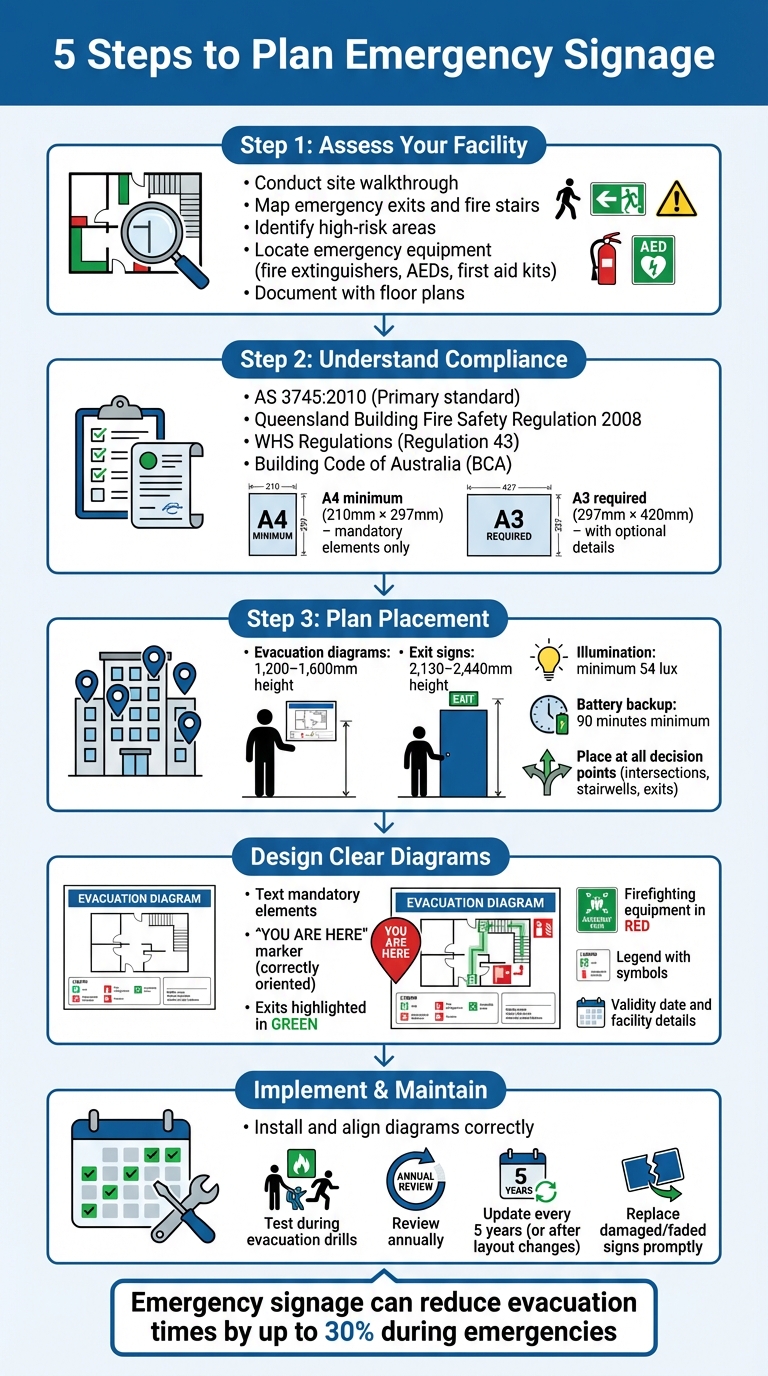
5 Steps to Plan Emergency Signage
When emergencies occur, clear signage can save lives by guiding people to safety and helping locate essential equipment like exits, fire extinguishers, and first aid kits. Proper planning ensures compliance with Australian standards such as AS 3745:2010 and the Queensland Building Fire Safety Regulation 2008. Here’s a quick breakdown of the five steps to plan effective emergency signage:
- Assess Your Facility: Identify essential safety signs for emergency exits, equipment, and high-risk areas through a detailed walkthrough and floor plan documentation.
- Understand Compliance: Follow Australian regulations, including AS 3745:2010, which outlines signage size, placement, and colour coding.
- Plan Placement: Ensure signs are visible, positioned at decision points, and tested for clarity in low-light or smoky conditions.
- Design Clear Diagrams: Include mandatory elements like "You Are Here" markers, assembly points, and legends that align with the viewer’s perspective.
- Implement and Maintain: Install signage, test during drills, and update diagrams every five years or after layout changes.
Emergency signage is a legal requirement in Australia and plays a key role in workplace safety. Regular audits and maintenance ensure your signage remains compliant and effective.
5 Steps to Plan Emergency Signage in Australia – Compliance Guide
Step 1: Assess Your Facility and Identify Emergency Needs
Before you install emergency signage, it’s crucial to understand your facility’s specific needs. Start by examining the entire space to pinpoint emergency exits, fire stairs, and evacuation routes. This will help you determine where signage is most needed to guide people effectively during an emergency.
Conduct a Site Walkthrough
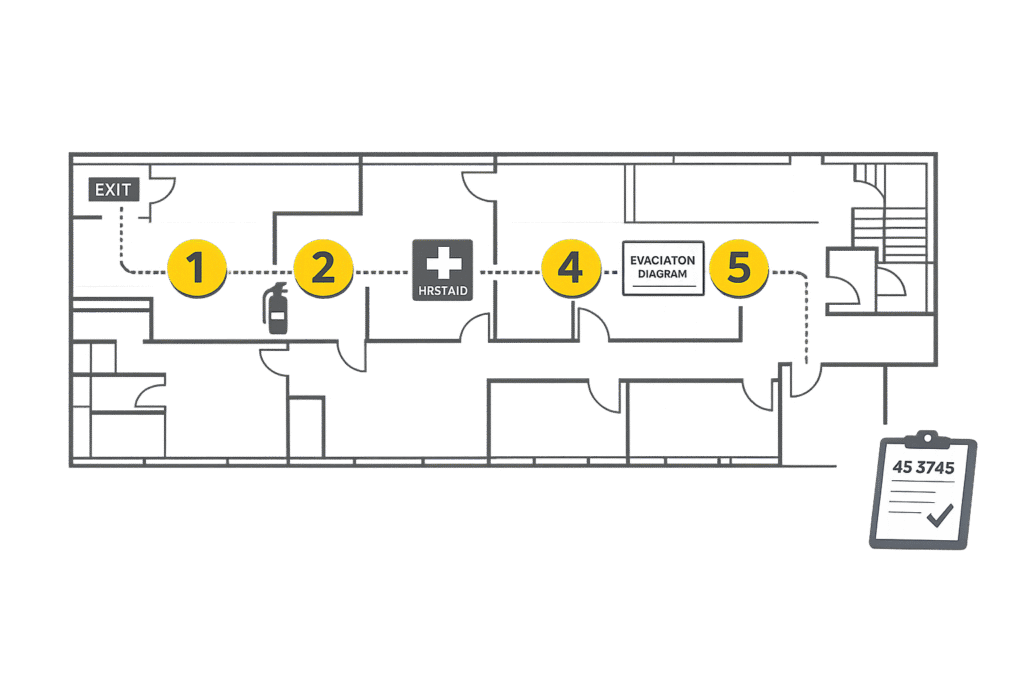
Take a thorough walk around your facility. Map out all emergency exits, fire stairs, and evacuation paths. Note the locations of essential emergency equipment like fire extinguishers, hose reels, fire blankets, and hydrants. Don’t forget to include fire indicator panels and emergency communication systems in your assessment.
Pay extra attention to high-risk areas, such as zones with high-voltage equipment, confined spaces, or spots requiring specific personal protective equipment. These areas should have clear danger signage to minimise risks. Also, identify where first aid kits, spill kits, and automated external defibrillators (AEDs) are located to ensure they’re easy to find during a medical emergency.
"Getting the orientation right can make the difference between swift, confident evacuation and dangerous hesitation in an emergency." – Fire Block Plans
Test the placement of diagrams to ensure "You Are Here" markers are correctly oriented. It’s also important to avoid mounting signage on fire doors, smoke doors, or fire-resistant structures, as this is not allowed.
Be sure to record all your observations immediately to assist with the planning of signage placement.
Document Key Areas
Create a detailed floor plan that includes all emergency exits, equipment, and assembly points. For accuracy, use architectural or CAD drawings. Your documentation should cover all required elements: emergency exits, fire stairs, fire indicator panels, firefighting equipment, and designated assembly areas.
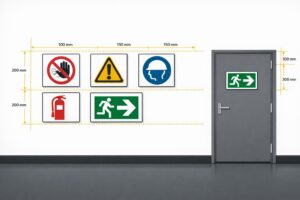
Use colour-coded lines to mark travel paths – green for evacuation routes and red for firefighting equipment locations – to meet Australian Standards. Indicate the "You Are Here" orientation for each sign and plan to mount signage at a height between 1,200 mm and 1,600 mm above the floor. Keep in mind that evacuation diagrams must meet size requirements: a minimum of A4 (210 mm x 297 mm) for mandatory elements and A3 (297 mm x 420 mm) if optional details like first aid or warden information are added.
This detailed mapping process lays the groundwork for proper and compliant emergency signage placement in the following steps.
sbb-itb-9950c92
Step 2: Understand Legal and Compliance Requirements
Once your facility layout is mapped, the next step is to ensure your emergency signage complies with Australian safety regulations. The primary standard to follow is AS 3745:2010 (Planning for Emergencies in Facilities), which applies across most states and territories. If you’re in Queensland, the Queensland Building Fire Safety Regulation 2008 is also relevant.
Key legal frameworks include the Work Health and Safety (WHS) Regulations (Regulation 43), which require emergency plans, and the Building Code of Australia (BCA), which outlines fire safety and evacuation requirements. Additionally, AS 1905.1 governs fire-resistant doorsets, so be cautious when mounting signage on fire or smoke doors, as it could affect their performance.
Below, we’ll explore how to navigate these standards and work closely with your Emergency Planning Committee to ensure compliance.
Review Relevant Standards
Start by obtaining a copy of AS 3745:2010 to understand its specific requirements. This standard covers details like diagram size, colour coding, and placement. For example, green is used to mark exits and travel paths, while red highlights firefighting equipment.
Pay particular attention to the technical requirements for the areas identified during your facility mapping. Here are some key points to keep in mind:
- Diagram size: A4 (210 mm x 297 mm) is the minimum size for diagrams showing only mandatory elements. If optional details like first aid stations or warden information are included, the diagram must be A3 (297 mm x 420 mm).
- Pictorial floor area: On an A4 diagram, the floor area must measure at least 200 mm x 150 mm.
- Mounting height: Diagrams should be installed at a height of 1,200 mm to 1,600 mm from the finished floor level.
These specifications ensure that your signage is both visible and easy to interpret during an emergency.
Consult Your Emergency Planning Committee
Your Emergency Planning Committee (EPC) plays a vital role in ensuring your signage meets all compliance and safety requirements. They are responsible for determining the number and placement of evacuation diagrams throughout your facility.
"The Emergency Planning Committee has a role to determine the location and number of evacuation diagrams for a facility." – CMG Fire and Safety [3]
Using your documented floor plan, the EPC will help identify the most effective locations for signage. They’ll also ensure that every placement supports your emergency response plan and that no critical areas are missed. Regular reviews are essential – evacuation diagrams must be updated at least every five years, but the EPC should conduct annual checks to maintain accuracy.
For emergency signage that complies with Australian standards and prioritises safety, consider working with a professional provider like PXP Safety. They offer tailored solutions to meet your facility’s specific needs.
Step 3: Plan Signage Placement and Positioning
Now it’s time to decide where your signage will go to ensure evacuation routes are clear and easy to follow. Careful placement is essential for making signs both practical and visible.
Position Signs for Maximum Visibility
According to AS 3745:2010, evacuation diagrams should be mounted at a height of 1,200–1,600 mm for easy visibility. Exit signs, on the other hand, should be installed between 2,130–2,440 mm high so they can be seen even over large crowds [6].
To meet safety standards, exit signs must be illuminated to at least 54 lux and should stay lit for a minimum of 90 minutes during a power outage [4] [5]. For workplaces larger than 300 m², emergency exit lights are a legal requirement across Australia [9]. It’s also crucial to place these signs in areas with emergency lighting so they remain legible even in smoky or dark conditions.
In areas prone to smoke, consider installing signs at both high and low levels. High-mounted signs are easier to spot from a distance, while low-mounted signs are useful when smoke obscures overhead views [5]. Before you finalise installation, test the visibility of signs from multiple angles to ensure nothing – like equipment, decorations, or structural features – is blocking them [4] [6].
Once you’ve addressed visibility, adapt the placement to suit your specific facility.
Tailor Placement to Workplace Layout
Signs should be positioned at every critical decision point along evacuation routes. This includes areas like intersections, stairwells, hallways, corners, and above exit doors. Each route should feature a clearly visible evacuation diagram [1] [6] [7] [8].
Orientation is equally important. Evacuation diagrams need to match the viewer’s actual perspective, with the "You Are Here" marker accurately reflecting their location. In office environments, signs should be prioritised near lifts and main exits. Industrial settings, however, might require signage near workstations and busy break areas.
To make sure no critical spots are overlooked, walk through the facility as if you’re unfamiliar with it. This can help identify blind spots where additional directional guidance is needed. At every turn or change in direction along evacuation routes, use directional signs like "Fire Exit Left" to provide clear, unambiguous guidance.
For robust and compliant signage suited to Australian conditions, PXP Safety offers options with UV protection and outdoor-grade printing, ensuring durability and visibility even in harsh environments.
Finally, don’t forget to regularly review and update your signage as workplace layouts change to keep everything effective and up to code.
Step 4: Design Clear Emergency Diagrams
Creating clear evacuation diagrams is crucial for guiding people quickly and safely during emergencies. Poorly designed diagrams can cause confusion when clarity is needed most. Building on your signage placement plan, the next step is to craft diagrams that meet compliance standards and are easy to understand within the context of your facility.
Include Required Elements
According to AS 3745-2010, evacuation diagrams must include several mandatory elements:
- Title: The words "EVACUATION DIAGRAM" in capital letters
- "YOU ARE HERE" Marker: Clearly showing the viewer’s current location
- Highlighted Exits: Marked in green, with firefighting equipment shown in red
- Emergency Communication Equipment: Such as Manual Call Points, Warden Intercommunication Points, and Fire Indicator Panels, along with a pictorial floor plan
- Assembly Areas: Clearly designated
- Legend: Explaining all symbols used
- Administrative Details: Including the diagram’s validity date, the facility’s name, address, and the nearest cross streets
The diagrams should be A4 size (210 mm × 297 mm) for mandatory elements. If optional details are included, they can be expanded to A3 size (297 mm × 420 mm), ensuring the floor plan dimensions remain proportional.
Use Orientation Markers
Proper orientation of the diagrams is essential to ensure they accurately reflect the actual layout of the building, reducing confusion. The "YOU ARE HERE" marker plays a key role in making the diagram functional. Each diagram must be specifically aligned with its installation location so that "up" on the map matches the direction the viewer is facing. This avoids the need for mental adjustments during high-stress situations.
As Fire Block Plans highlights:
"Getting the orientation right can make the difference between swift, confident evacuation and dangerous hesitation in an emergency" [1].
Reusing a single diagram for multiple locations is a common mistake. Instead, each diagram should be tailored to its specific position. If you include a site plan showing the assembly area, it should follow the same orientation as the floor plan to avoid spatial confusion.
Accurate and well-orientated evacuation diagrams can significantly improve safety, reducing evacuation times by up to 30% during emergencies [2]. This makes the extra effort to ensure proper orientation well worth the investment.
Step 5: Implement, Test, and Maintain Your Signage System
Once you’ve handled compliance, design, and placement, it’s time to focus on bringing your signage system to life. This step involves installing, testing, and maintaining your signs to ensure they function effectively and meet all required standards.
Install and Test Signage
Start by mounting your evacuation diagrams as planned. While doing so, double-check that the "You Are Here" markers are correctly aligned with the viewer’s perspective of the building layout. This small detail is crucial to avoid confusion during emergencies.
Run evacuation drills to confirm that staff can easily locate exits, firefighting equipment, and assembly points. If your system includes photoluminescent or illuminated exit signs, simulate power outages to ensure they remain visible in low-light conditions. Your Emergency Planning Committee should supervise these tests to guarantee compliance with AS 3745:2010 standards. Once testing confirms everything is in order, focus on maintaining the system regularly.
Schedule Regular Maintenance
Keep your signage system in top condition by reviewing it annually for accuracy and physical integrity. Diagrams should be updated every five years or after any changes to the building layout [1]. Responsibility for this task falls on the business owner, manager, or Emergency Planning Committee.
Additionally, conduct audits after any structural modifications or changes in building usage. Check that all required elements – such as exit points, fire indicator panels, firefighting equipment locations, assembly points, and symbol legends – are still present and legible. Regularly clean the signs and promptly replace any that are damaged or faded to ensure they remain effective in emergencies.
| Maintenance Task | Frequency |
|---|---|
| Review all signage | At least annually |
| Update diagrams | Every 5 years (or as needed) |
| Test during drills | According to emergency plans |
Additional Considerations for Emergency Signage Planning
When planning emergency signage, it’s crucial to think beyond the basics. Technical and environmental factors play a big role in ensuring your signage works effectively in all conditions.
One key issue is power outages. Standard electrical signs become useless in the dark. Regulations in Australia require exit lights to have at least 90 minutes of battery backup, and for buildings larger than 300 m², illuminated signs are mandatory [9][12]. LED exit signs are a smart choice here – they’re energy-efficient and come with reliable battery backup systems [11].
Another option is photoluminescent signage, which doesn’t rely on electricity at all. These signs absorb ambient light during normal conditions and can glow for over 50 hours in complete darkness [11]. High-quality options start with an initial brightness of over 150 mcd/m², making them perfect for areas like stairwells or heritage buildings where electrical installations might be tricky [11]. However, keep in mind that these signs need enough ambient light to "charge" properly [10].
Smoke can also affect visibility, so it’s worth considering how it behaves. Smoke tends to rise and linger near the ceiling, which makes floor-mounted glow path markers a practical solution. These markers stay visible below the smoke layer where the air is clearer. They’re particularly useful in high-traffic areas like cinemas or underground car parks. Costing between $40 and $80, these markers can guide evacuees safely below the smoke [11]. To make them even safer, opt for textured, anti-slip surfaces to prevent slips when wet from sprinkler systems [11].
Environmental conditions can also impact signage. For example, exterior doors or wash-down areas might require "Wet Location" or NEMA 4X-rated housings to protect emergency circuits from moisture [10]. In industrial settings, signage might need to highlight spill kit locations or hazardous zones, while offices often focus on lift areas and standard exits [1]. Tailoring signage to your specific workplace needs ensures it remains effective and compliant.
Regular maintenance is just as important as the signage itself. Australian regulations require professional testing of emergency lighting systems every six months [9][12]. Modern self-testing units can handle automatic monthly and annual discharge tests, which saves time on manual checks while keeping everything compliant [10][11].
For more information on compliant emergency signage solutions, check out PXP Safety.
Conclusion
Emergency signage plays a crucial role in protecting lives when every moment matters. Clear and well-placed signs guide people to safety during high-pressure situations, helping to reduce panic and enabling first responders to quickly locate essential equipment. By ensuring your signage is compliant and easy to understand, you not only facilitate swift evacuations but also highlight your dedication to workplace safety.
In Australia, adhering to standards like AS 3745:2010 is a legal requirement under Work Health and Safety laws. Failing to comply can lead to hefty fines and legal repercussions. Keeping your signage up to date also minimises the risk of costly replacements due to regulatory changes. Regular audits are essential to maintain accuracy and visibility, ensuring that directional signs point the right way and fire safety signs are located near the equipment they reference. These steps strengthen the overall effectiveness of your emergency signage plan.
Effective signage planning is more than just a legal necessity – it’s about prioritising safety, ensuring compliance, and maintaining operational readiness. By evaluating your facility, staying informed about regulations, placing signs thoughtfully, creating clear evacuation diagrams, and routinely maintaining your system, you contribute to a safer environment for everyone.
For customised emergency signage solutions in Australia, visit PXP Safety. They can help you meet compliance standards while enhancing safety across your workplace.
FAQs
How many evacuation diagrams does my workplace need?
Australian standards mandate at least one evacuation diagram in all key areas where people gather, including exits and common spaces. The number required depends on the size and layout of your workplace. To comply with AS3745-2010, these diagrams must be positioned in accessible and highly visible spots, such as stairwells, corridors, and communal areas, ensuring clear guidance during emergencies.
Do I need illuminated exit signs or photoluminescent signs?
When deciding on the right type of emergency exit signage, consider your specific safety requirements, local building codes, and the surrounding environment. Illuminated signs, such as LED or battery-powered electric signs, are highly effective for maintaining visibility during power outages or in smoky conditions. On the other hand, photoluminescent signs, which absorb and store light energy, glow in the dark and offer visibility in low-light settings or during power failures. Whichever option you choose, ensure it complies with Australian standards like AS 2293 and the National Construction Code for proper safety and regulation adherence.
When must emergency signage be updated after changes?
Emergency signage needs to be updated whenever there are changes that affect the information or layout shown. This could include alterations to facility layouts, updates to emergency procedures, or shifts in the locations of safety equipment. Keeping signage up-to-date is essential to comply with Australian Standards, such as AS3745-2010. Regular reviews are highly recommended, particularly after renovations or modifications, to ensure signage remains accurate, easy to understand, and compliant.
Related Blog Posts
You may also be interested in
FAQs About Workplace Safety Signs in Australia
AS 1319 sign types, placement, materials and maintenance for workplace safety and WHS compliance in Australia.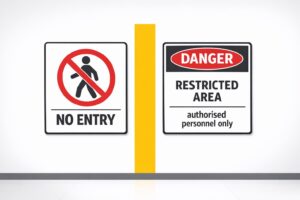
Restricted Area Signs vs. No Entry Signs
Compare No Entry and Restricted Area signs in Australian workplaces — meanings, design differences and AS 1319 compliance.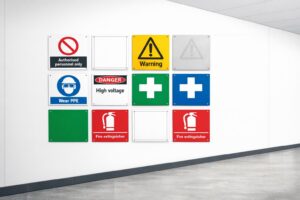
How to Spot Workplace Signage Gaps
Audit your workplace for missing, faded or non‑compliant signs under AS 1319 to reduce incidents and avoid WHS fines.
Symbol Design: Global Standards Explained
Explains ISO 7010 and ISO 3864: standard symbols, colours and sizing for clear, language‑free safety signage and AU compliance.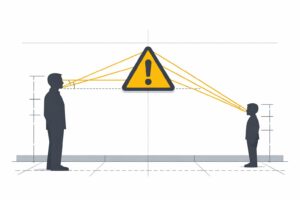
Hazard Sign Visibility Planner
Plan hazard sign placement for max visibility with our free tool. Ensure safety by finding the best spot, height, and angle—try it now!