5 Steps to Add Safety Signs to Risk Plans
Safety signs are a key part of workplace risk management, helping to communicate hazards and enforce safety protocols under the WHS Act 2011. To comply with Australian regulations, signs must meet the AS1319-1994 standard and align with broader hazard control strategies. Here’s a quick summary of the five steps to include safety signs in your risk plans:
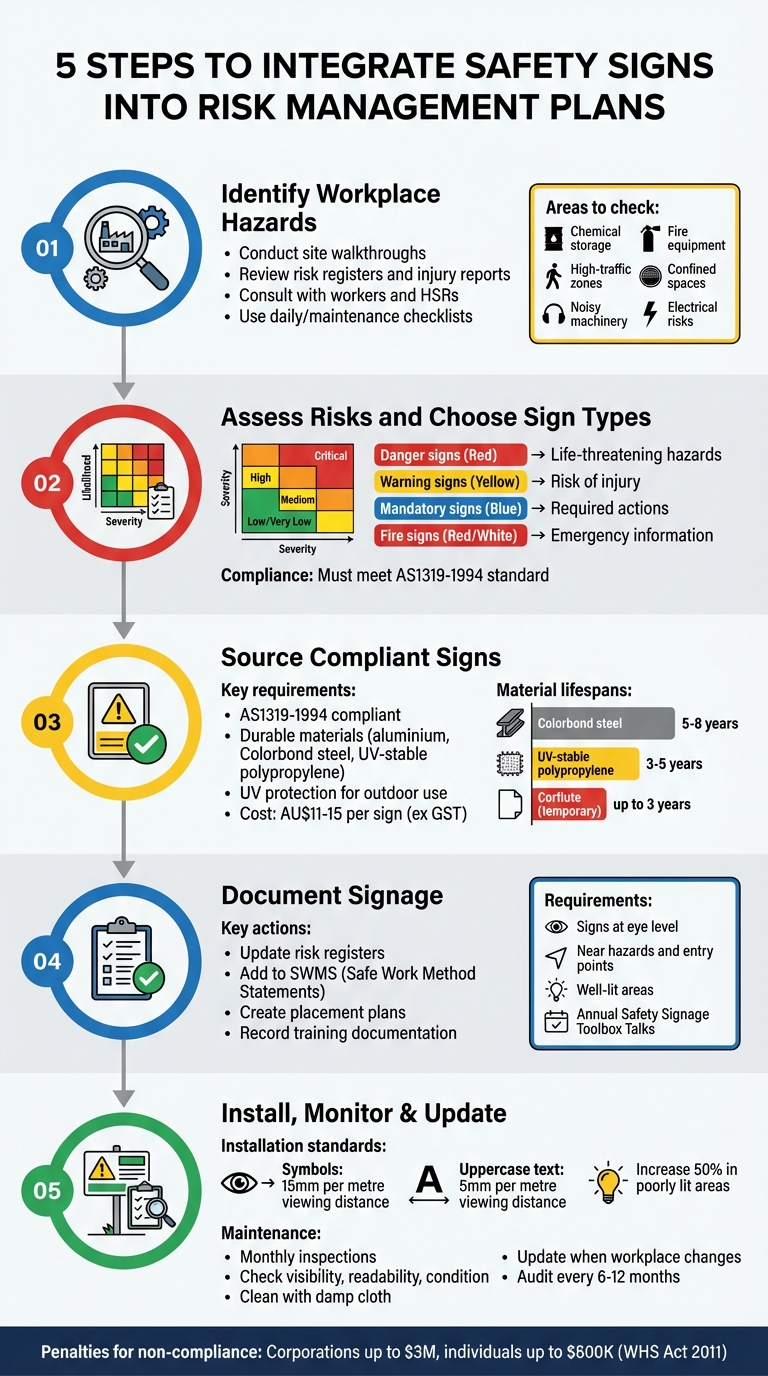
- Identify hazards: Inspect your workplace, consult workers, and review risk registers to pinpoint areas needing signs.
- Assess risks and choose signs: Use a risk matrix to prioritise hazards and select appropriate signs (e.g., Danger, Warning, Mandatory, Fire).
- Source compliant signs: Invest in durable, AS1319-compliant signs designed for Australian conditions, like aluminium or UV-protected materials.
- Document signage: Update risk registers, Safe Work Method Statements (SWMS), and create placement plans to ensure proper record-keeping.
- Install, monitor, and update: Place signs at eye level, conduct monthly inspections, and update signage as workplace risks evolve.
5 Steps to Add Safety Signs to Workplace Risk Management Plans
Safety Signage
Step 1: Identify Workplace Hazards That Need Safety Signs
Creating effective safety signage begins with pinpointing exactly where hazards exist in your workplace. This involves conducting thorough inspections, reviewing documentation, and consulting with workers, as outlined in the WHS Act 2011. These steps form the foundation for selecting the right safety signs.
Start with a detailed site walkthrough to identify potential risks like frayed electrical cords, unstable stacks of materials, noisy machinery, or chemical leaks. Don’t overlook your existing risk registers and injury reports – they can highlight recurring issues or near misses that might otherwise go unnoticed.
Expert advice stresses the importance of being proactive. Nathan McDonald, Assistant State Inspector at SafeWork NSW, explains:
"Often the risk has never occurred to them because it’s how they’ve always done it or been told how to do it. And unfortunately, it’s often only when an accident does occur that the penny drops" [4].
Worker consultation is not just a legal requirement but also a practical approach. Employees who work directly with equipment, chemicals, or workplace systems often have insights into hazards that might not be apparent during inspections. Involve Health and Safety Representatives and frontline workers to uncover these hidden risks.
Use tools like daily and maintenance checklists to identify common hazard areas, such as chemical storage, fire safety equipment, high-traffic zones, confined spaces, noisy machinery, and electrical risks. Once hazards are identified, apply a risk assessment matrix to evaluate the likelihood and potential impact of incidents. This helps prioritise the most critical hazards, ensuring the most serious risks are addressed first.
Step 2: Assess Risks and Choose the Right Sign Types
Once hazards have been identified, the next step is to evaluate their risks and match them with the appropriate safety signs. This involves answering two key questions: How likely is the hazard to cause harm? and How severe could that harm be? [2][3].
A risk assessment matrix can help in this process. By cross-referencing the likelihood of an incident (ranging from Very Unlikely to Very Likely) with its potential impact (from Negligible to Severe), you can categorise risks into levels such as Very Low, Moderate, or Critical. This categorisation helps prioritise which hazards require immediate attention and determines the type of signage needed [2].
The type of sign you use depends on the severity of the hazard:
- Danger signs are for life-threatening hazards.
- Warning signs address risks of injury.
- Mandatory signs indicate required actions.
- Fire signs provide emergency information [1].
It’s important to note that signs are not a standalone solution. They work best alongside other safety measures as part of a broader hazard control strategy. Matching the right sign to each risk ensures clear communication and compliance.
Meeting Australian Standards Requirements
After selecting the appropriate signs, ensure they align with AS1319-1994, the Australian standard for workplace safety signage. This standard governs the design, colour coding, and symbols used, ensuring clarity and consistency across all workplaces [1].
Key requirements include:
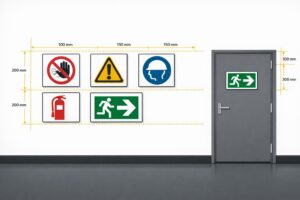
- Symbols must be at least 15mm per metre of viewing distance.
- Uppercase text should be no smaller than 5mm per metre of viewing distance.
- In poorly lit or hard-to-see areas, increase these sizes by at least 50% [1].
Signs should also be placed at eye level, against a contrasting background, and remain unobstructed by objects like equipment or materials [1]. Adhering to these guidelines ensures that safety signs are both visible and effective.
Applying the Hierarchy of Controls
Safety signage is just one element within the Hierarchy of Controls, a framework for managing workplace risks. Before relying on signs, aim to eliminate the hazard entirely or replace it with something safer. If removal isn’t feasible, implement engineering controls such as machine guards or improved ventilation systems. Signs act as a supplementary measure to alert workers about residual risks that remain [2][3].
When deciding on control measures, it’s essential to consider what’s "reasonably practicable." This involves weighing the likelihood of harm against the cost and feasibility of implementing each control [3]. By integrating signage with other controls, you create a comprehensive approach to workplace safety.
Step 3: Source Compliant and Long-Lasting Safety Signs
When it comes to safety signs, durability and compliance are non-negotiable. While cheaper options might seem appealing at first glance, they often fail to stand the test of time, especially in Australia’s tough environmental conditions. Signs that wear out quickly not only compromise safety but also require frequent replacements, ultimately costing more in the long run.
To ensure your safety signs meet Australian standards, look for products that comply with AS1319-1994. These standards ensure the signs are fit for purpose and can withstand the elements. Standard safety signs generally cost between AU$11.00 and AU$15.00 (ex GST), with discounts available for bulk orders – such as 7% off for 10 units or up to 17% off for orders of 50 or more [6]. By investing in high-quality materials, you reduce replacement costs and strengthen your workplace’s risk management practices.
The Importance of Durable Materials
The materials you choose for your safety signs play a critical role in their longevity. For Australian conditions, options like aluminium, Colorbond steel (with a lifespan of 5 to 8 years), and UV-stable polypropylene (lasting 3 to 5 years in temperatures ranging from -40°C to 150°C) are excellent choices [8][9].
UV protection is another must-have feature. Without it, signs can fade rapidly, which could lead to non-compliance with AS1319 standards [1][5]. Companies like PXP Safety address this issue by applying UV protective films over outdoor-grade printing on durable aluminium bases. This approach ensures that signs remain clear, readable, and compliant for years. For temporary needs, such as construction sites, lightweight corflute signs offer a cost-effective option, lasting up to three years [8].
Creating Custom Signs for Specific Hazards
While standard safety signs cover common hazards, some situations call for tailored solutions. Custom signs allow you to address unique risks while still adhering to AS1319 guidelines on colour, layout, and sizing [5][9]. For example, compliance requires that uppercase text is at least 5mm tall and lowercase text 4mm tall for every metre of viewing distance [1][8].
sbb-itb-9950c92
Step 4: Add Signage to Risk Management Documentation
After sourcing your safety signs, the next vital step is incorporating them into your formal documentation. This creates an auditable trail that showcases your risk management efforts. Without proper records, even the most strategically placed signs might not provide legal protection in the event of an incident. This documentation also helps guide updates to your risk registers and safety procedures.
Each time you conduct a risk assessment, make sure to update your risk register to include every sign as a control measure. For example, you might document warning signs placed at entry points to areas with fall risks [10][11]. Similarly, add signage details to your Safe Work Method Statements (SWMS) and the WHS Management Plan. Specify the types of signs used, such as mandatory PPE signs near scaffolding, and outline how they are monitored over time [13][11].
A placement plan is another essential component. Your documentation should detail that signs are mounted at eye level, placed near hazards, positioned at entry points, and installed in well-lit areas [11]. For areas with poor lighting, Australian Standards suggest increasing the size of the signs to ensure they remain visible [12].
Don’t forget about training documentation. Keep records of staff inductions and organise annual Safety Signage Toolbox Talks to combat "sign blindness" – a common issue where employees overlook signs they’ve seen repeatedly [11]. As noted by Safe-R Outcomes:
"Sometimes people become blind to the safety signs in the workplace as they have seen them so often… delivering a safety signage toolbox talk is a great way to remind employees of their importance" [11].
These training records not only confirm that your team is familiar with site-specific signage but also serve as evidence of your commitment to risk management.
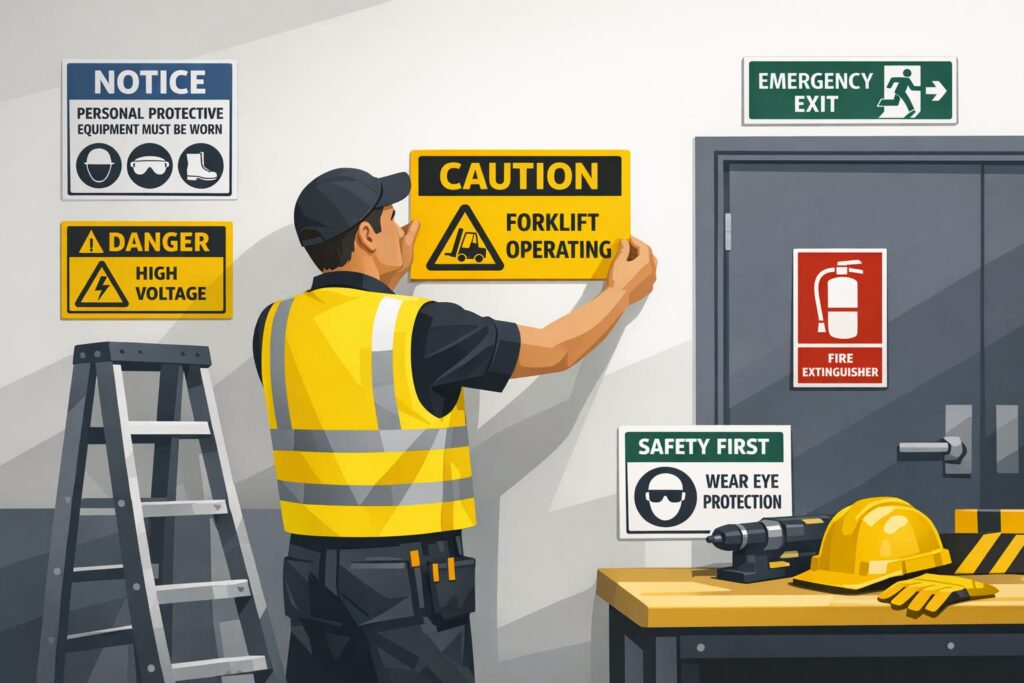
Step 5: Install, Monitor, and Update Safety Signs
After finalising your risk management plan, the next step is to install safety signs in a way that ensures they are effective and easy to notice. Signs should be placed clearly within the line of sight and against a background that contrasts well to make them stand out [1]. When putting up outdoor signs, it’s important to follow a checklist to address risks like working at heights or being near overhead electrical lines [15]. Proper placement of signs plays a key role in supporting your safety measures.
Visibility standards are essential for safety signs to serve their purpose. In well-lit spaces, symbols should measure at least 15 mm for every metre of viewing distance, while uppercase text should be at least 5 mm per metre [1]. WorkSafe ACT emphasises the importance of maintaining signs, noting:
"Safety signs should be maintained in good condition, kept clean and well illuminated" [1].
Make sure workers are trained on the purpose of each sign. Employers are responsible for explaining what each sign means and ensuring employees understand the precautions they need to take [1][7].
Conducting Regular Sign Inspections
Safety signs and related equipment should be checked monthly [17]. During these inspections, confirm that all signs are visible, easy to read, and in good condition. Look out for any damage such as tears, cracks, fading, or warping. Also, ensure signs are not blocked by materials or new equipment [1][16][17]. Clean signs with a damp cloth, avoiding harsh cleaning chemicals, and document each inspection in a logbook [1][16][17]. These routine checks help maintain the effectiveness of your overall safety strategy.
Updating Signs as Workplaces Change
As workplaces evolve, so do the risks. Safety signs should be updated whenever there are changes to workplace systems, tools, machinery, or equipment, or when incident reports highlight gaps in safety measures [2]. Reviewing and updating signage is part of the ongoing process of hazard identification and risk assessment. Once updates are made, reassess any remaining risks. Keep in mind that safety signs alone typically reduce risk by 10–50% [2]. If risks remain too high, additional safety measures should be implemented. The SAFE method – See the hazard, Assess the risk, Fix it (install signs), and Evaluate the effectiveness – is a practical approach for managing these updates [2].
Conclusion
Incorporating safety signage into your risk management plan does more than just tick compliance boxes – it plays a crucial role in clearly identifying hazards and protecting workers. By following five essential steps, you can align with Australian WHS regulations and prioritise the safety of everyone on site.
Effective risk management relies on the durability and visibility of your signage. High-quality, UV-resistant aluminium signs are built to withstand Australia’s harsh outdoor conditions, staying readable for years. On the other hand, faded or damaged signs not only compromise safety but also breach the Work Health and Safety Act 2011. The penalties are steep – corporations could face fines exceeding $3 million, while individuals risk fines up to $600,000 [14]. As Reflective Fabrications Australia aptly states:
"A sign that’s blocked, faded, or too small is as good as no sign at all" [14].
To maintain effectiveness, it’s essential to conduct regular reviews. Experts recommend auditing your signage every 6–12 months, updating risk documentation to reflect any changes, and holding annual toolbox talks to ensure staff remain familiar with the meaning and importance of safety signs.
However, as Michael Selinger, Editor-in-Chief of the Health & Safety Handbook, points out:
"A sign on its own cannot be the single safety solution for controlling any particular hazard or risk – it must be used in conjunction with other controls" [7].
When paired with comprehensive training and engineering controls, compliant safety signage becomes a vital piece of your broader safety strategy.
FAQs
What makes a safety sign compliant with AS 1319-1994 standards in Australia?
To ensure a safety sign complies with AS 1319-1994 standards in Australia, it must adhere to several key requirements:
- Background and design: The sign must use the prescribed background colour, shape, and colour scheme outlined in the standard.
- Symbols and text: Symbols should be at least 15 mm in size, and text should measure a minimum of 5 mm per metre of viewing distance.
- Visibility: The sign must offer strong contrast with its surroundings to remain easily visible.
- Placement and stability: Signs should be securely installed in a clear, stable location – ideally at eye level – and must remain legible from the intended viewing distance.
These rules are designed to ensure safety signs are clear, effective, and meet Australian workplace safety standards.
How often should workplace safety signs be checked and updated?
Safety signs need consistent attention to stay effective, compliant, and up-to-date. Conducting an annual signage audit is a good practice, complemented by routine checks during regular workplace inspections. Any changes in the workplace – like the introduction of new equipment, layout adjustments, or updated safety protocols – should prompt an additional review.
During inspections, look out for signs that are damaged, faded, or no longer relevant. Replace them quickly to ensure they remain visible and effective. Keep a record of all inspections and updates to maintain a reliable and current risk management plan.
How do safety signs fit within the Hierarchy of Controls?
Safety signs are classified as an administrative control within the Hierarchy of Controls. Their primary purpose is to alert workers and deliver essential information about potential hazards, particularly in situations where higher-level controls, such as elimination or engineering measures, aren’t practical.
Although safety signs cannot remove risks entirely, they are a crucial element of a well-rounded risk management strategy. By keeping workers informed, these signs contribute to creating a safer working environment and help reduce the likelihood of accidents.
Related Blog Posts
You may also be interested in
FAQs About Workplace Safety Signs in Australia
AS 1319 sign types, placement, materials and maintenance for workplace safety and WHS compliance in Australia.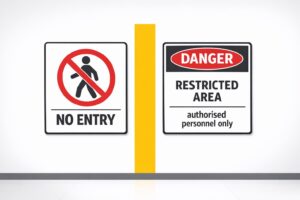
Restricted Area Signs vs. No Entry Signs
Compare No Entry and Restricted Area signs in Australian workplaces — meanings, design differences and AS 1319 compliance.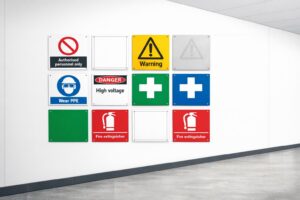
How to Spot Workplace Signage Gaps
Audit your workplace for missing, faded or non‑compliant signs under AS 1319 to reduce incidents and avoid WHS fines.
Symbol Design: Global Standards Explained
Explains ISO 7010 and ISO 3864: standard symbols, colours and sizing for clear, language‑free safety signage and AU compliance.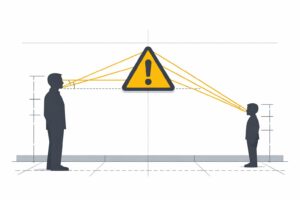
Hazard Sign Visibility Planner
Plan hazard sign placement for max visibility with our free tool. Ensure safety by finding the best spot, height, and angle—try it now!